The Minolta Maxxum 5000 is a 35mm SLR film camera from the 90s intended for intermediary users. It has all the common features of SLRs of its time but has electronic switches instead of mechanical knobs and buttons. It also features an autofocus system and a fully automatic program mode.
This camera is part of the last generation of film cameras, so it works very similar to a newer digital SLR. In fact, the cameras of this time are as advanced as the digital cameras that came later. So, let’s see hot to use the Minolta Maxxum 5000.
Basic Controls
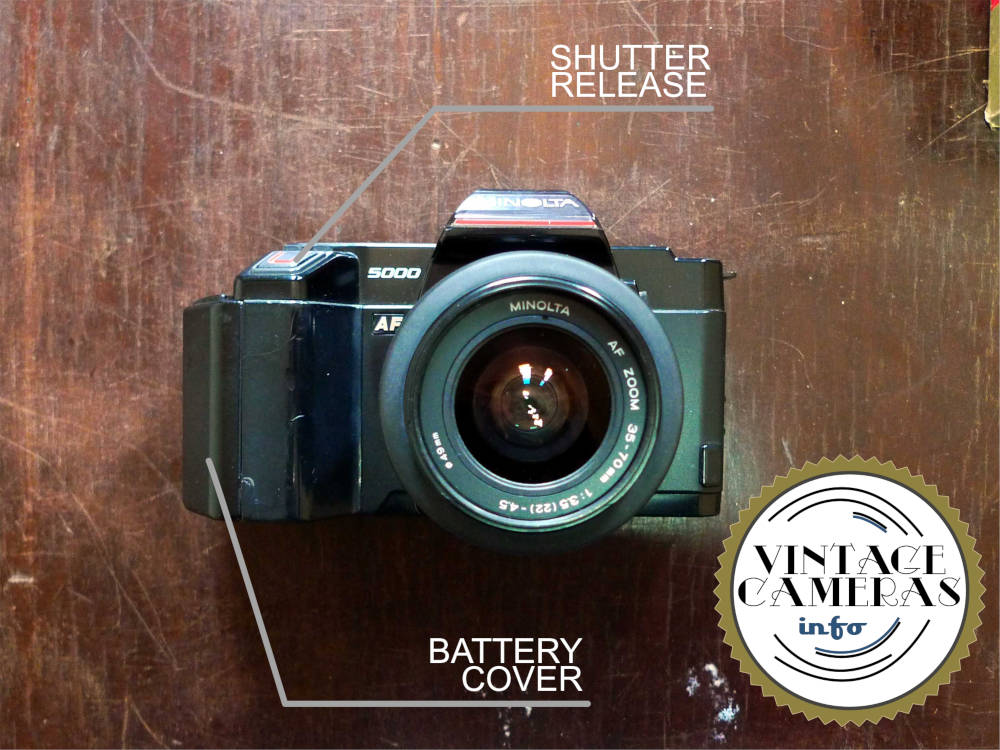
The Minolta Maxxum 5000 is definitely a camera made to be easy to use. It has a simplified control scheme which is very simple to operate. As you can see below, in fact, it has few controls on its front.
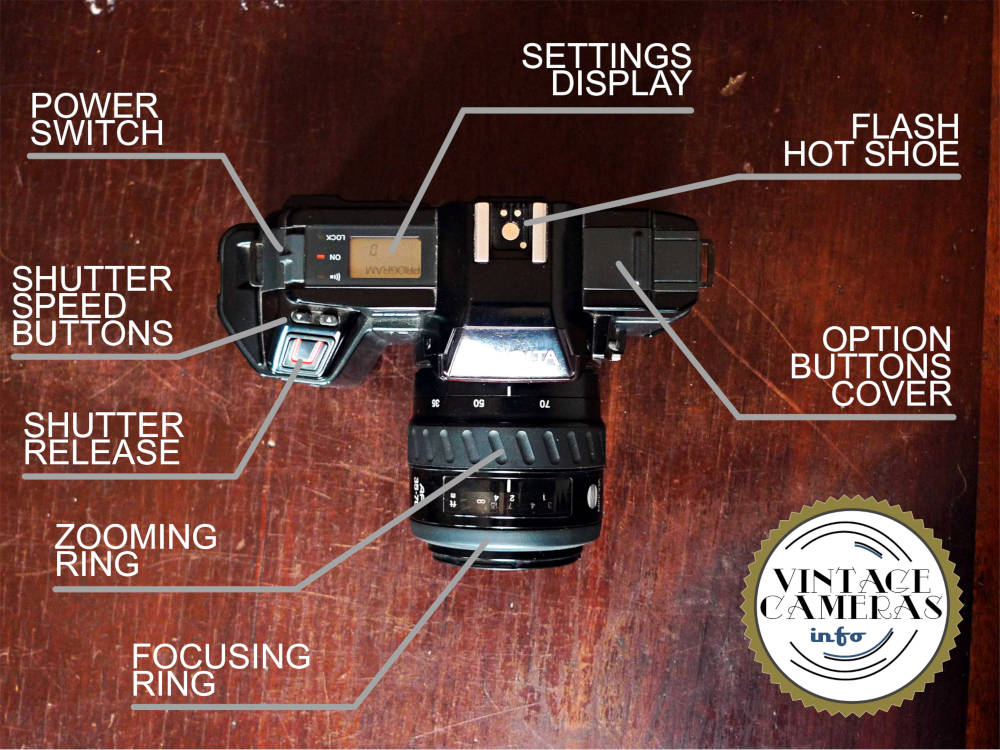
Most of cameras settings are located on its top, like the power switch, the flash hot shoe, the shutter release and the option buttons. The shutter speed is adjusted via two electronic buttons next to the shutter release.
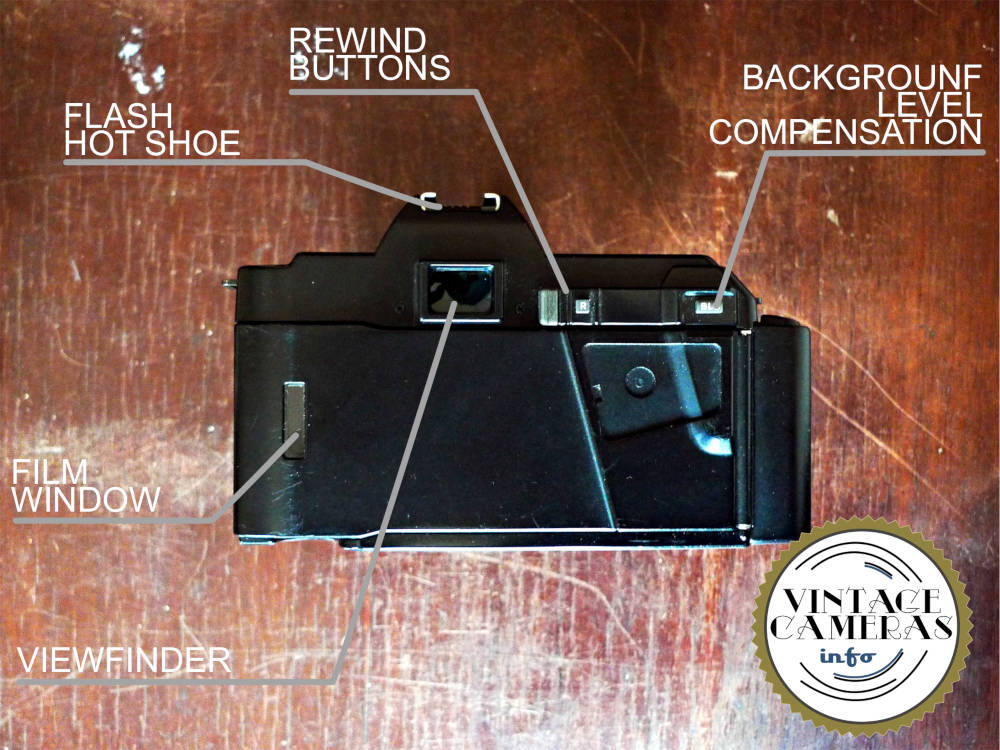
There are also few features on its back like the rewind button and latch, the background level compensation, the viewfinder and the film window, from which you can read the brand and ISO of the film that is currently loaded into the camera.
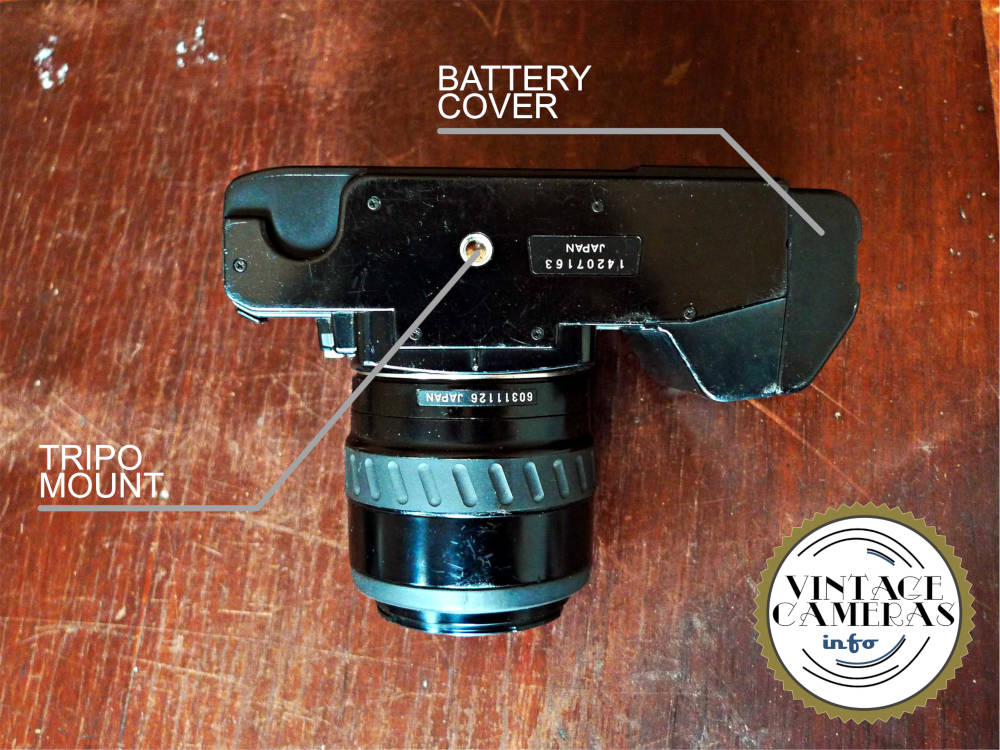
The minimalism of this design is also seen at the bottom, where it only has a standard tripod mount.
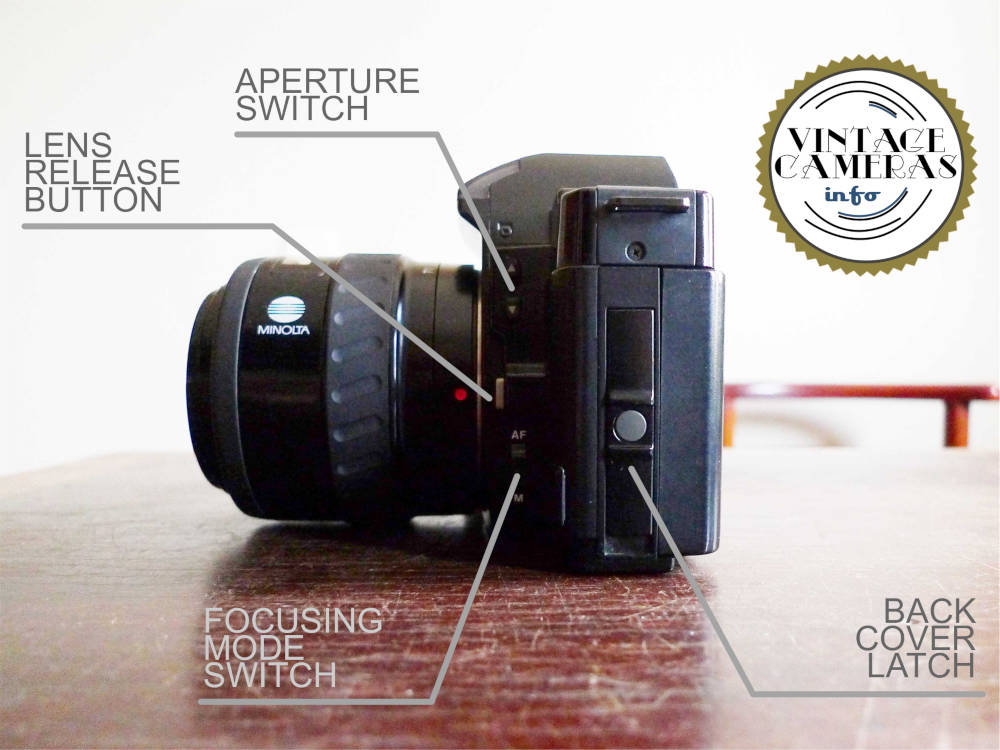
There are some more commands on the left side of the Minolta Maxxum 5000, which are the aperture switches, the lens release button, the focusing mode, and the back cover latch.
How to install the battery in the Minolta Maxxum 5000
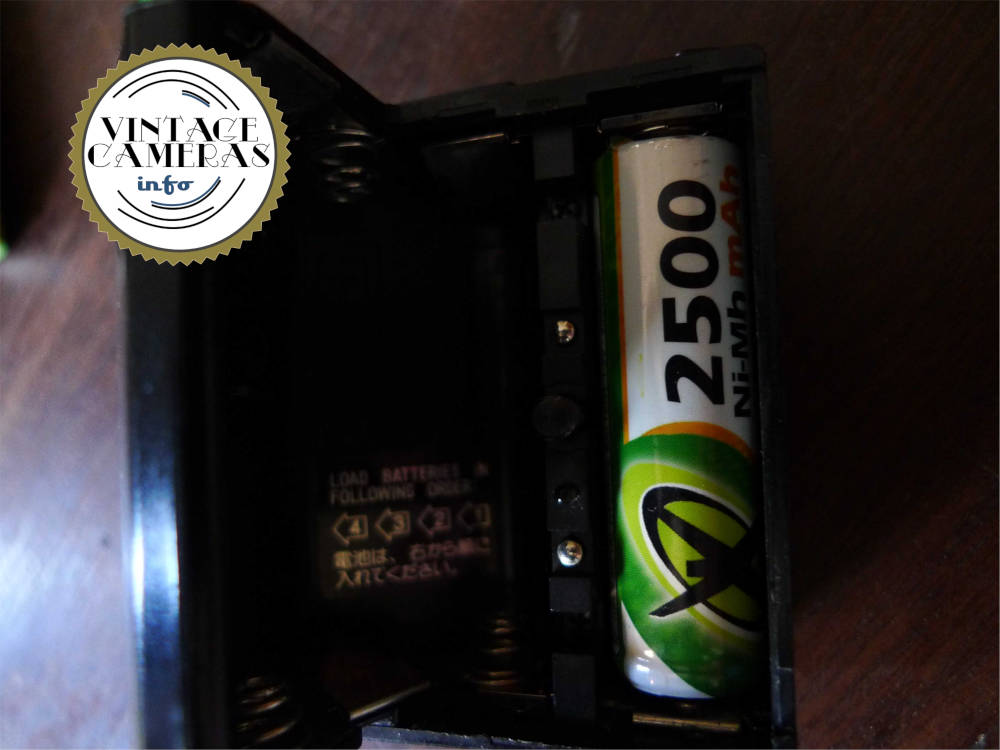
The Minolta Maxxum 5000 uses four AA or four AAA depending on the type of battery holder, which is also the camera handle. Mine uses the AA which is bigger. I use standard rechargeable NiMh batteries on mine without any problems and they last several rolls of film. To install the batteries in the Minolta 5000, follow these steps:
- Undo the cover screw on the right side of the camera turning it counterclockwise using a coin.
- Pull the battery cover, which is also a holder.
- The batteries are installed in a specific order, as you can see in the label inside the cover.
- Insert the first battery in the right slot as indicated.
- Proceed to insert the other 3 batteries paying attention to the polarity indicated in the cover.
- Put the battery cover back in place and do the screw. You don’t need to screw it too tight, so you can do it with your fingers without the need for a coin.
Turning the camera on
To turn the camera on, slide the power switch to the ‘on’ or the beep position. The display and the viewfinder will become active. In the beep mode, the camera uses a beep to indicate under or overexposure, the timer and to indicate succesful focus. To keep it quiet, select the ‘on’ mode.
Focusing in the Minolta Maxxum 5000
One of the best features of the Minolta Maxxum 5000 is the autofocus system. To use it, just point the camera where you want to focus and press the shutter release button until the first stage. The lens focusing ring will rotate to both sides to hunt for the optimal focusing point. Once it is done, a green LED in the bottom of the viewfinder display will light indicating the focusing is successful, followed by a beep.
If the camera can’t find a good focus, the green LED won’t light and the camera won’t shoot if you press the release button until the end. In this case, it is probable that the camera couldn’t find an object’s edge or there is low light.
Try to move it around and aim the center of the screen at something that has some details, like a window, a vase or a person’s head. Since it doesn’t feature a focusing auxiliary light, you can use your cell phone to illuminate the area you want to focus.
Also, the camera will keep the focus while the shutter release button is maintained at the first stage. So you can set the focus and then move the camera around without losing the focusing distance. This is a walkround for the lacking of focusing zones in the screen. The Minolta Maxxum 5000 works the same way as any modern digital camera. The focus is always done at the center of the screen.
However, it has a manual focus mode which is selected via the slide button on the left side of the lens socket, just below the lens release button and the aperture buttons.
The manual focus is done in the same way as all SLRs. The image will become sharp in the viewfinder screen if on focus. The Minolta Maxxum 5000 doesn’t have a split beam display at the center like older camera designs.
Shooting Modes
The Minolta Maxxum 5000 has two shooting modes: a program and a manual. The program manual selects the best combination of aperture and shutter speed to achieve the most sharp image possible. The manual mode let the user select both shutter speed and aperture with the help of the built-in photometer.
How to select the Manual mode in the Minolta Maxxum 5000
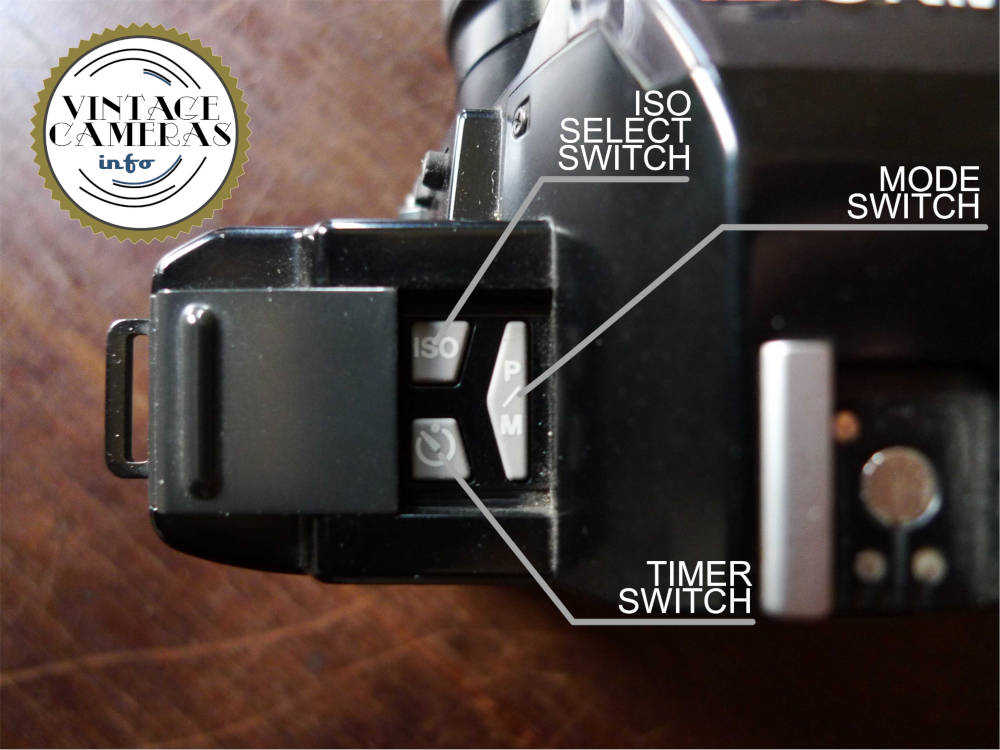
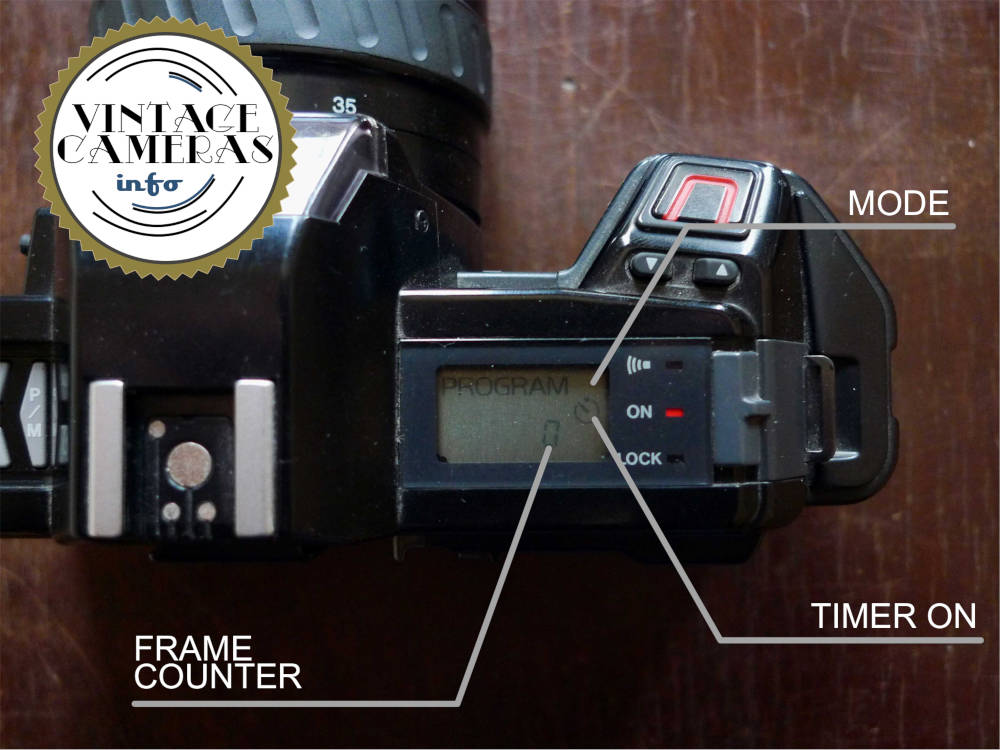
The program mode is the default operation mode of this camera. To access the manual mode, slide the options cover on the left top side of the camera to the left as shown below. Press the ‘P/M’ button to toggle between the two modes. The current operation mode is shown on the display on the right side. It will show ‘Program’ or ‘M’.
Photometry
The photometry is shown in a small display at the botton of the viewfinder screen. Aim the camera where you want to use as a reference for photometry, press the shutter release until you reach the first stage, as in modern digital cameras, and it will automatically show the current shooting mode, shutter speed, photometry and aperture, in this order as shown in the image below.
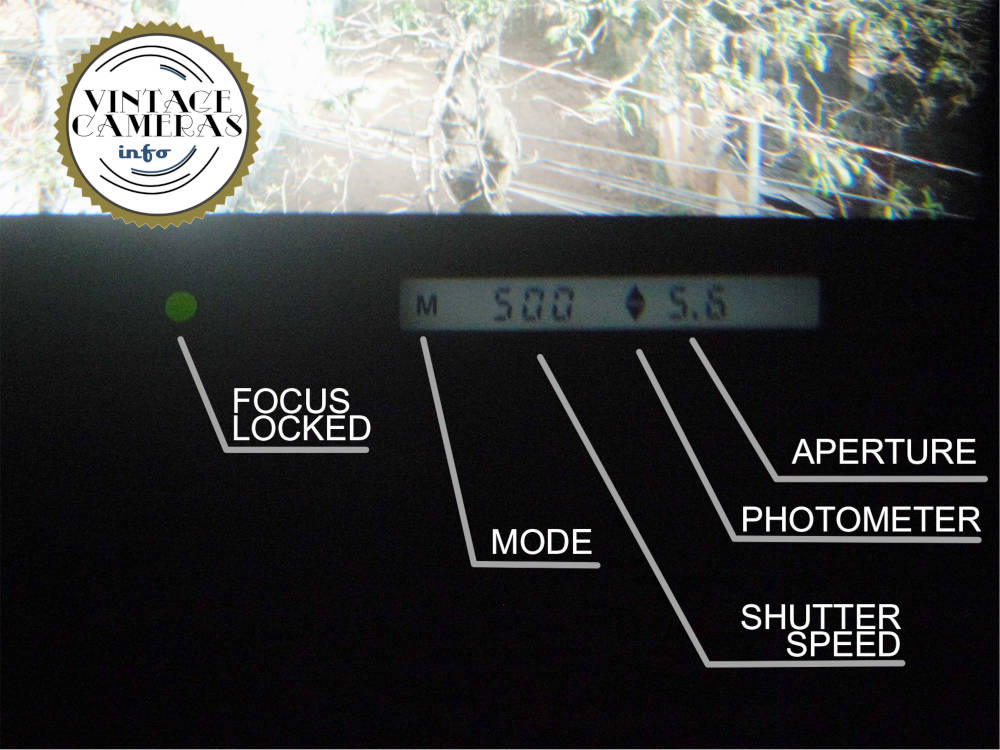
If you are in P mode, the camera automatically selects speed, aperture and doesn’t display the photometry arrows. If you are in manual mode, an ‘M’ will appear on the left side of the display, and at least one of the photometry arrows will appear. The down arrow indicates under-exposure, the upper arrow over-exposure, and both arrows at the same time indicate ideal exposure, much like the Zenit 12XP system.
This camera also has a background level compensation that is activated through the ‘BLC’ button in the back of the camera. The BLC increases the exposure by two f-stops, so if you are photographing someone against a light background, the camera will compensate for the exposure to highlight the person, for example.
Since this camera doesn’t have an aperture priority mode, I would suggest using the manual mode in the following way:
- Aim at the object or person you want as a photometry reference.
- Press the shutter release button until the first stage, as in modern digital cameras. The camera will light the display inside the viewfinder.
- Now, set the aperture you want using the two buttons at the left side of the lens mount.
- The photometer will indicate an arrow up or arrow down to indicate over or under-exposure. Use the two buttons with arrows next to the shutter release button to adjust the shutter speed until both arrows appear in the display.
How to load film in the Minolta Maxxum 5000
To load film in the Minolta Maxxum 5000 follow these steps:
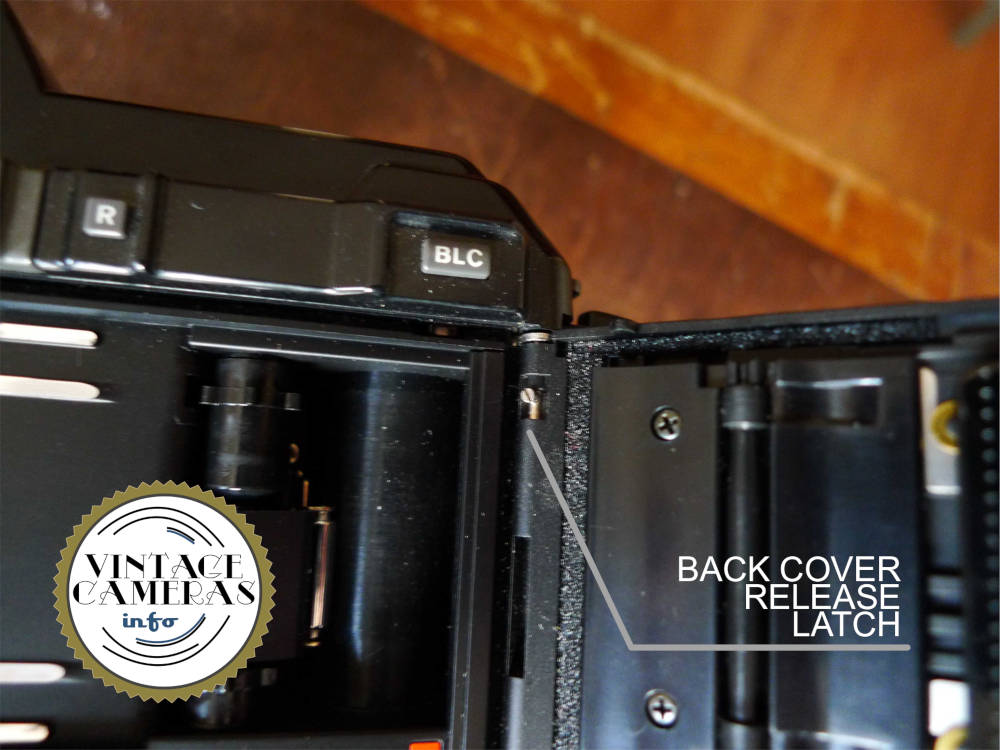
- Open the back cover pushing the gray button on the left side of the camera while sliding it down.
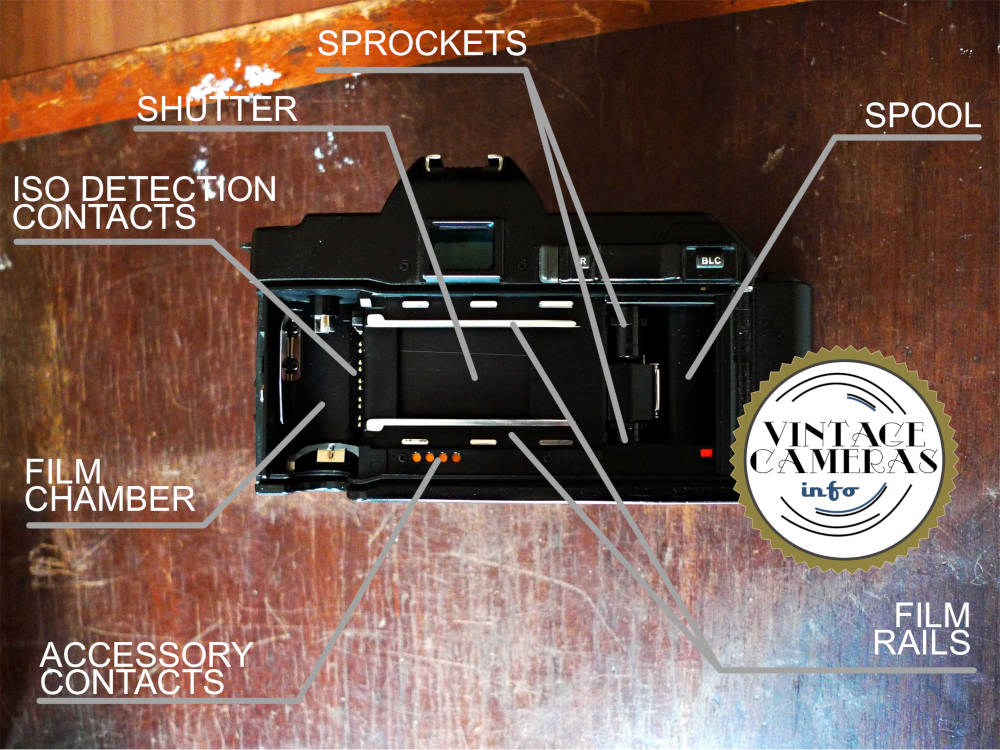
- Insert the film roll into the chamber (see the inside parts in the photo below).
- Pass the film tip over the rails and land it over the spool, making sure the film tip passes behind it.
- Make sure the film holes are engaged with the sprockets.
- Close the back cover. the camera will push the film automatically and will be ready to shoot the first photo. The ISO of the film will be displayed along with the number ‘1’ in the frame counter.
- The Minolta 5000 automatically detects the ISO of the film. However, if the system fails or if you are using a reload film roll, the ISO can be set manually using the ISO button under the sliding cover of the right side of the camera body. Press the ISO button while selecting the correct value using the shutter speed buttons.
How to rewind and unload film in the Minolta Maxxum 5000
Once you finish the film, the camera will indicate it reached the end of the roll. To rewind the film, press the ‘R’ button at the bach of the camera and push the rewind slide to the left. The camera will automatically rewind the film. Once it is finished, open the back cover and remove the film.
How to use the timer in the Minolta Maxxum 5000
To use the timer, just slide the options cover on the top of the camera body and press the timer button. The timer option will light in the main display. Place the camera in a tripod and compose the photo, set the focus and the photometry if you are in manual mode.
Then, press the shutter release button until the end and run. The camera will beep and flash a light to indicate it is going to shoot. he frequency of the light and beep will increase as time passes. Also, the remaining time is shown on the main display.
How to remove the lens in the Minolta Maxxum 5000
To remove the lens, press the square button at the side of the lens socket and then turn the lens a quarter of a turn. When you feel it is free, pull it gently. It must slide out without any effort.
To install the lens, align the red dots of the lens and the socket and offer the lens to the camera body. It should fit without any effort. Then turn it clockwise about a quarter of turn until it locks in place.
Some photos with the Minolta Maxxum 5000
Here are some photos I had taken with my Minolta 5000 using a Fujifilm Fujicolor C200. The autofocus worked well and I couldn’t lock it a few times. Exposure is always on spot, even on difficult scenes like the last one.
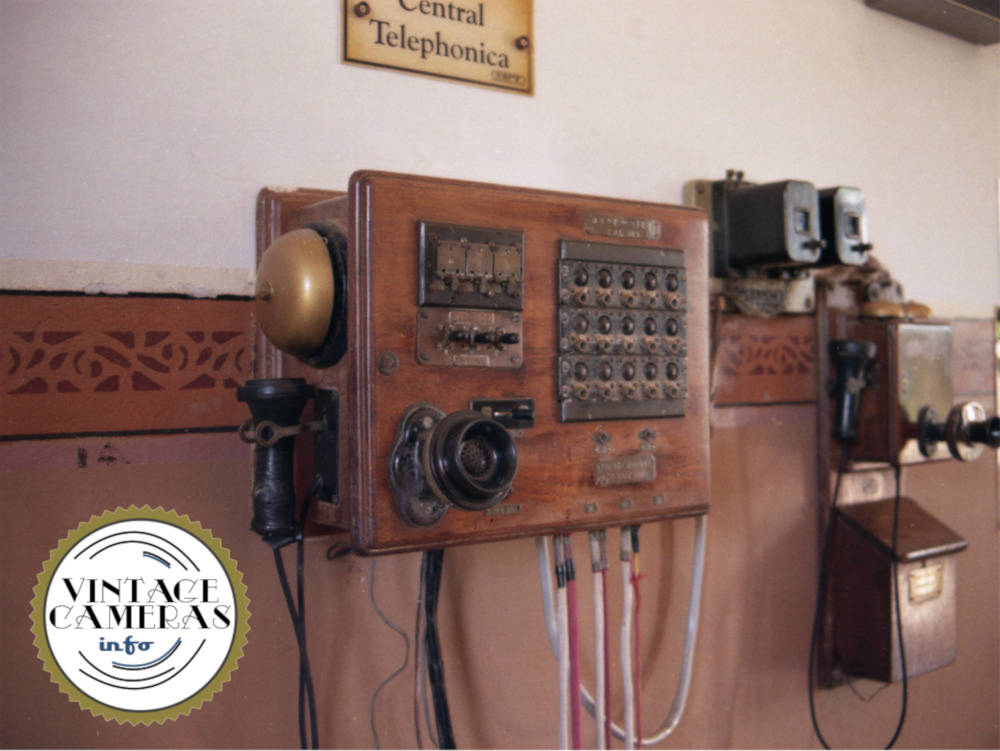
All photos needed almost no post-processing due to wrong exposure or colors. Although this Fujifilm is known for its realistic colors, the lens also helped without any doubt. Images are always sharp, too.

I only think a bit annoying the lack of aperture priority mode, however using the procedure I told on the sections above, I could make some bokehs without any hassle.

Apart from that, I like the ergonomics and the button positions, which are much easier to operate than the wheels and dials of other cameras. You can change the shutter speed without removing your hand from the camera body, which is great. I also like its boxy design and early 90s looks.
Without any doubt, the Minolta Maxxum 500 is a capable camera that I would recommend to anynone.