Originally posted on my now-disabled blog VintageCameras.info
The Elnica 35 Electronic is a 35mm mirrorless film camera made by Ricoh in the 70s. In some countries, it was sold under the Elnica brand while in others it was branded as Ricoh.
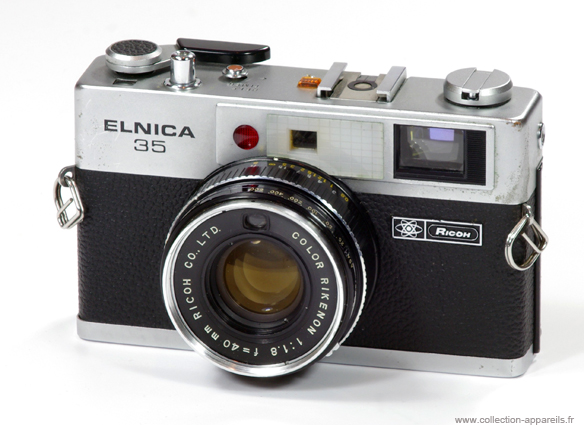
The Ricoh Elnica 35 Electronic has an automatic light metering system and a fast 1:1.8 lens. In my tests, the photometry is always spot-on and the camera is really nice to use. Lens definition is another strong feature of this camera. Focusing, although manual, is very easy through the rangefinder, as we will see in a following section.
I personally prefer this camera over its most popular competitor, the Olympus Trip 35. The reasons are the faster lens (1:1.8 vs the 1/2.8 of the Olympus) and, most importantly, the continuous and precise focusing system of the Ricoh 35 Electronic. The disadvantages are the size, which is way bulkier than the Olympus, and that it needs batteries to work.
All in all, it is an incredibly capable camera, taking pictures with as much quality as good SLRs like the Pentax K1000, as you can see in the samples at the end of this article. It is also an excellent choice for everyday carry. The 40mm lens will cover most of the situations and it will always be ready to shoot.
So, let’s move on and learn how to use this beauty!
Basic Controls
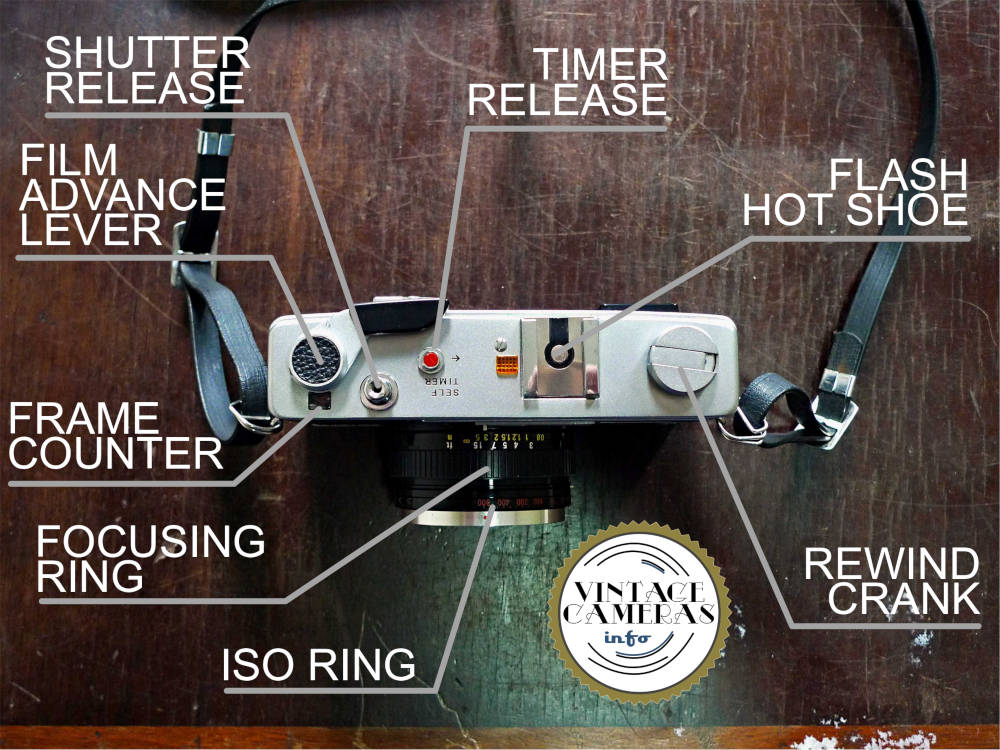
Most of the controls of the Ricoh Elnica 35 Electronic are located at the top of the camera body. There, we find most of its features, such as the flash hot shoe and the timer release.
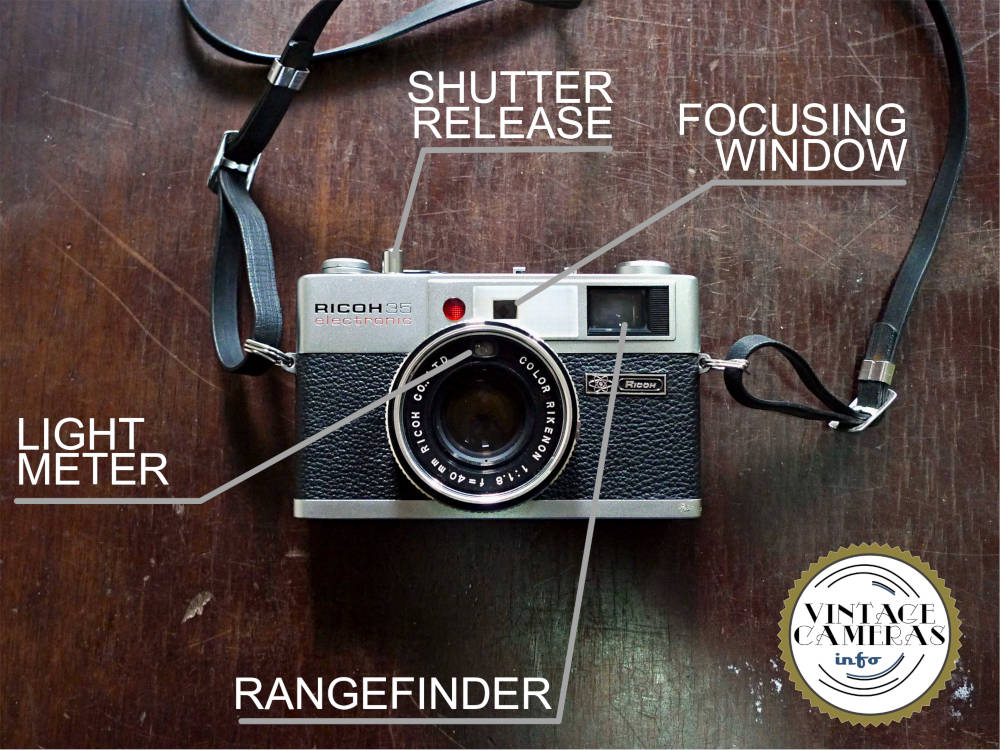
At the front, the most important features, aside from the lens, are the light-metering sensor, the rangefinder, and the focusing window. The later is an important part of the focusing system, as I will explain seen later. The shutter release button features a thread for an extension cable.
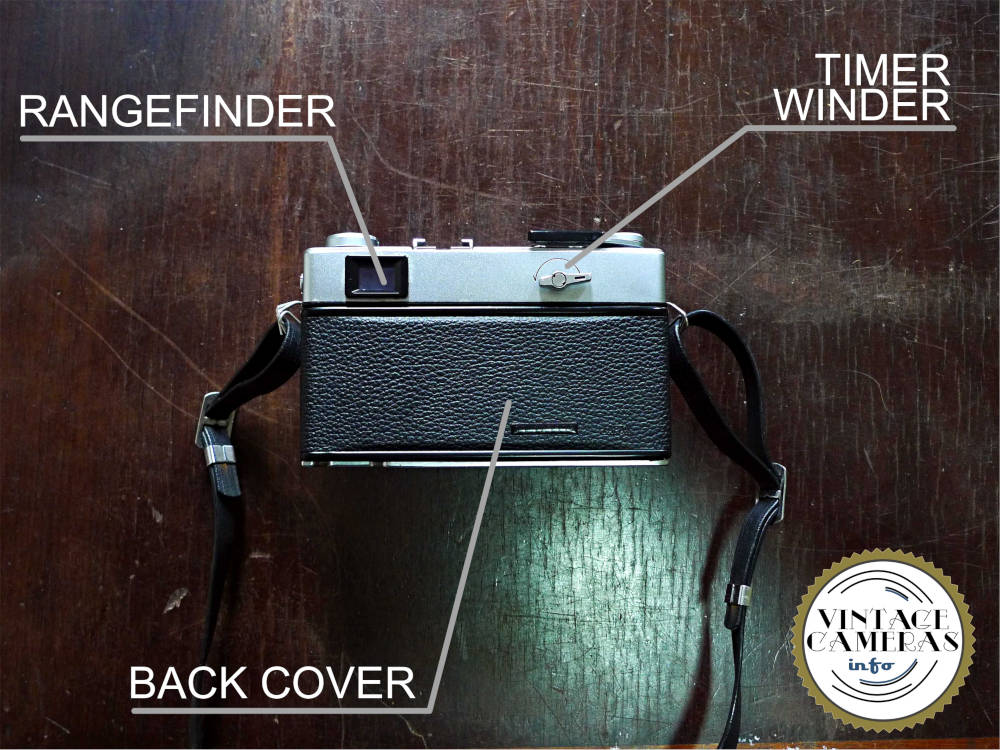
From behind, apart from the viewfinder and back cover, there is the timer winder lever.
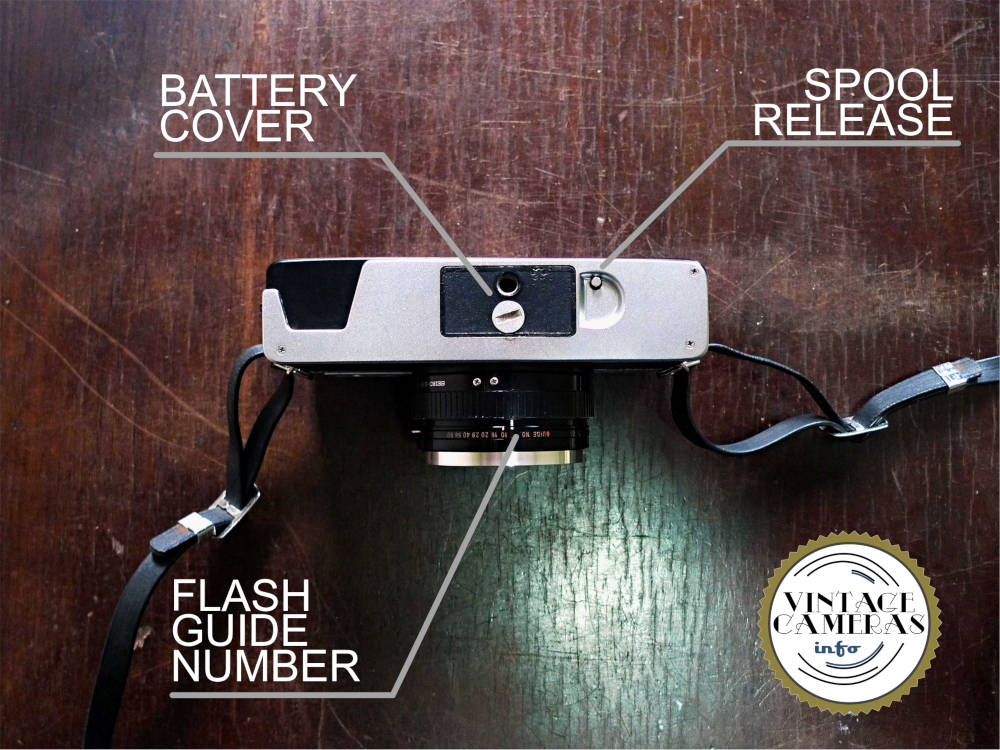
At the bottom, the most important features are the spool release button, the battery cover, and the flash guide number. There is also a standard tripod mount with a 1/4″ thread.
How to install batteries in the Ricoh Elnica 35 Electronic
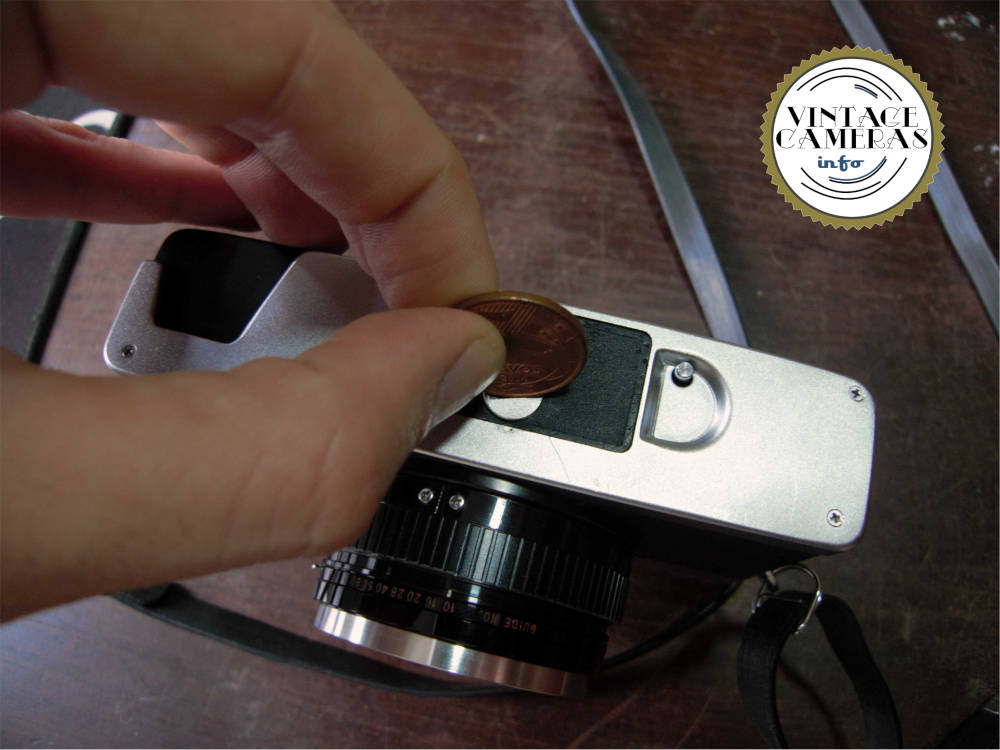
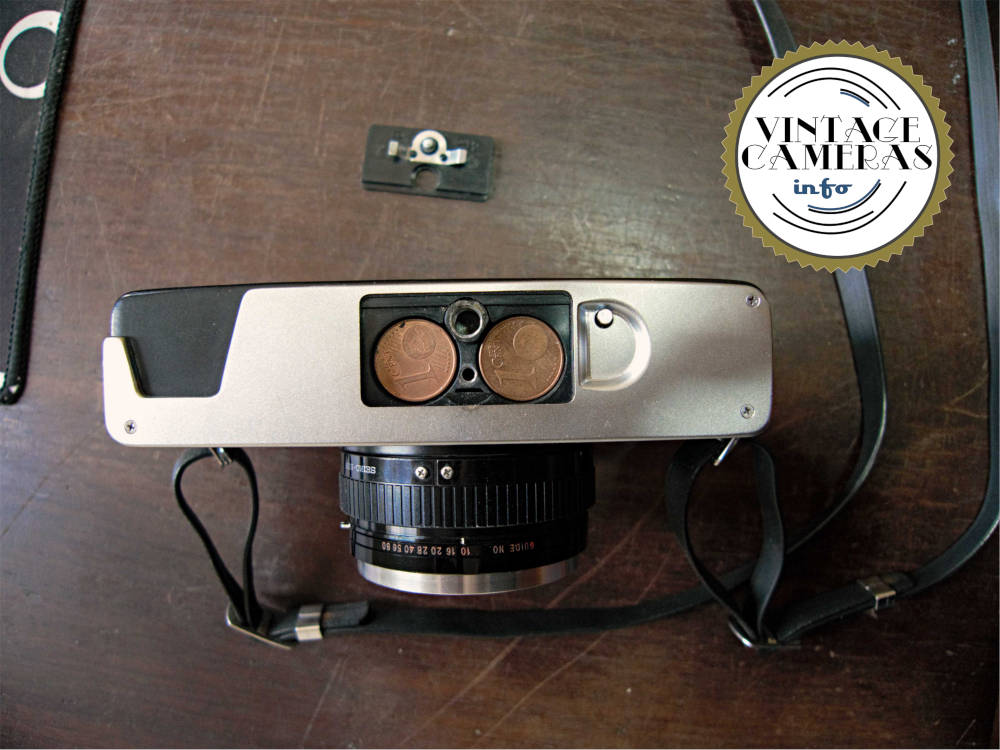
The Ricoh Elnica 35 Electronic uses two 1.5V battery cells. However, I could not find any battery that would fit directly into this camera. In this case, I used two regular LR44 batteries and some 1 cent Euro coins (which are equivalent to a penny in the U.S.).
To install batteries in the Elnica Electronic 45, follow these steps:
- Unscrew the battery cover using a penny or any 1 cent coin.
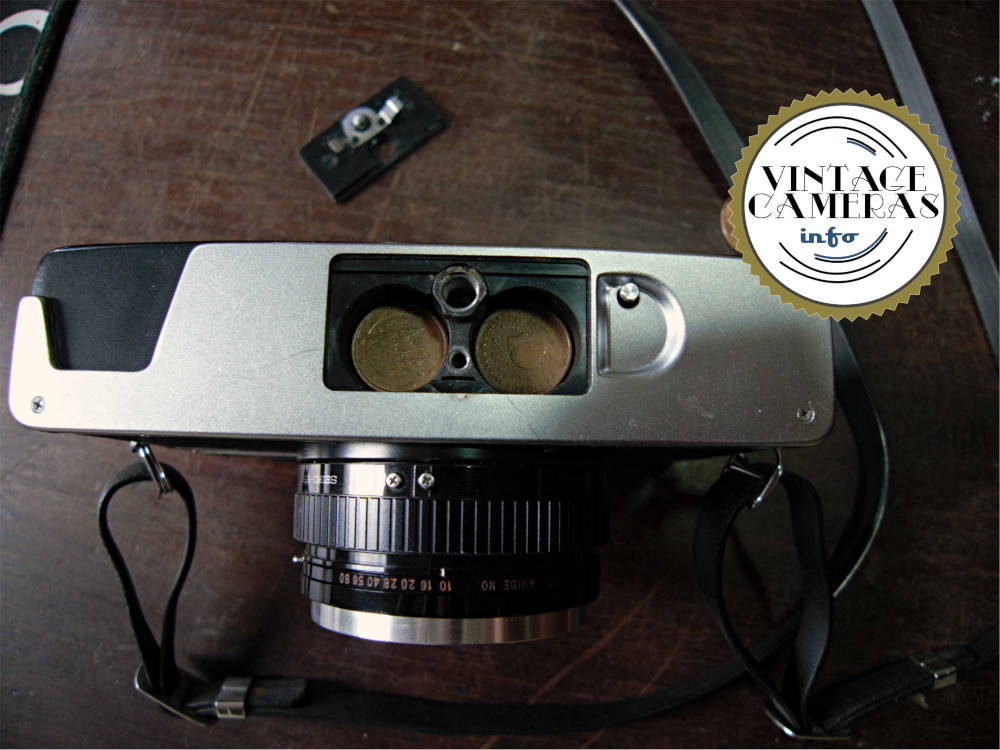
- Insert two 1 cent coins into each battery chamber.
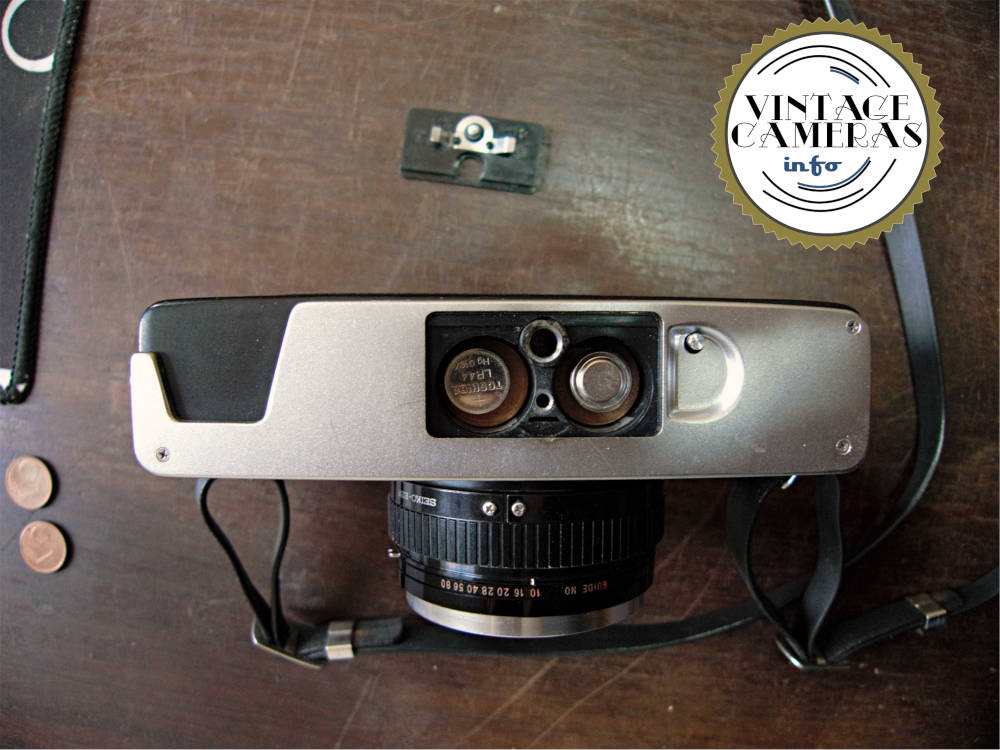
- Now, insert one LR44 battery in each side, oriented as in the images below.
- Stack one more 1 cent coin in each side and screw the cover back.
So, on each side, we are going to stack 2 coins, an LR44 battery, and another coin. So, in total, we are using 6 coins and 2 LR44 batteries. Now, if you press the shutter release button, the orange light at the top of the camera must turn on to indicate the camera is working. It will also light inside the rangefinder. This camera won’t work without batteries or if the electronics are damaged, though.
Light-metering system
The light metering system of the Ricoh Elnica 35 is an analog electronic circuit that controls both aperture and shutter speed. It is a primitive form of the modern Program mode of later cameras. The user cannot control those parameters individually.
The way it works is that the metering sensor at the lens collects light until the circuitry detects enough light has come through. So, when you press the shutter release button, the shutter, which is also the aperture, will continuously open until the electronic circuit saturates, causing it to close. If there is plenty of light, it will happen soon. However, if the light is dim, the shutter will open completely and stay there until it senses enough light has come in.
So, the Ricoh Elnica 35 Electronic can be used both at sunlight or at night. I could achieve shutter opening times of several seconds. Also, it counts with a wide ISO range, from 50 to 800. You can learn how it works by covering the sensor and pressing the shutter release. In a completely dark environment, it will remain open for a very long time. However, I couldn’t determine the equivalent shutter speeds of this camera.
I know what you are thinking right now. With such a fast lens, can it bokeh? In some situations, yes. You must learn how much light it needs to open completely, which usually happens at the golden hour for ISO 200 films.
Exposure compensation can be manually done by increasing or decreasing the ISO value.
How to focus with the Ricoh Elnica 35 Electronic
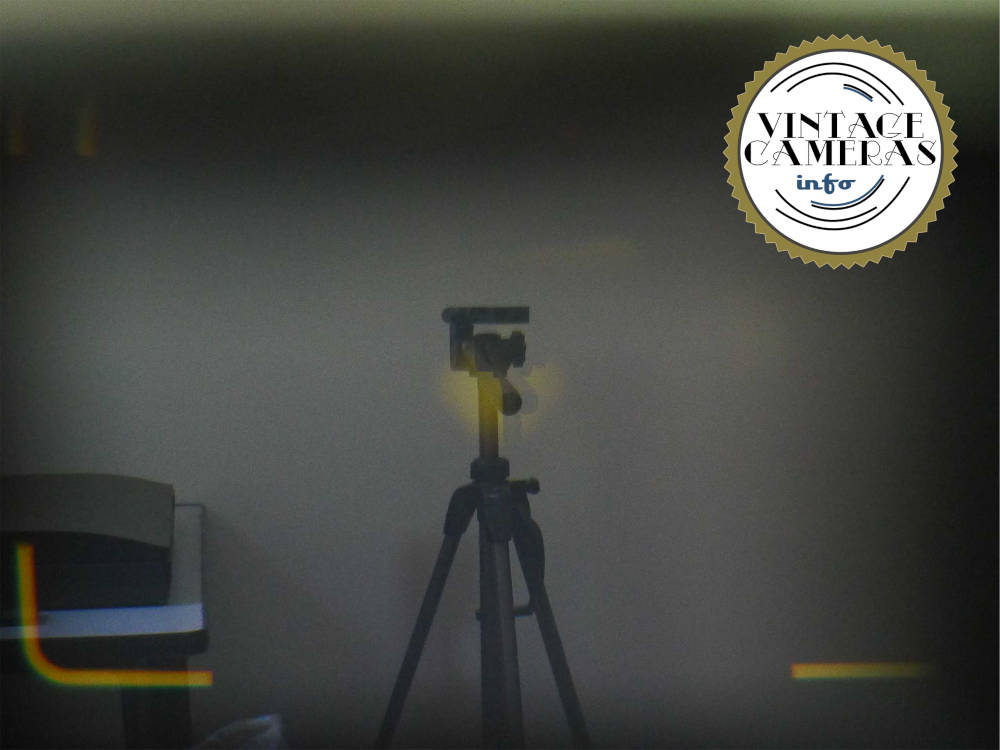
The focusing system of the Ricoh Elnica 35 Electronic is quite straightforward to use. Looking inside the viewfinder, you are going to find a yellowish spot at the center of the screen. This spot combines the images coming from the viewfinder and the focusing window at the front of the camera.
If the subject is out-of-focus, there will be two images at the yellow spot. Then, move the focusing ring and see if the images merge. When focusing is achieved, the center spot will form a sharp and continuous image, as in the second image below.
I found this system easier to use than the split prism of most SLRs. Also, it works best with sharp objects such as fences and wall borders. If, however, you can’t focus correctly due to lack of light or contrast, you can simply adjust the focus through the indicated distance in the lens barrel.

How to load film in the Ricoh Elnica 35 Electronic
To load film in the Ricoh Elnica 35 Electronic, follow these steps:
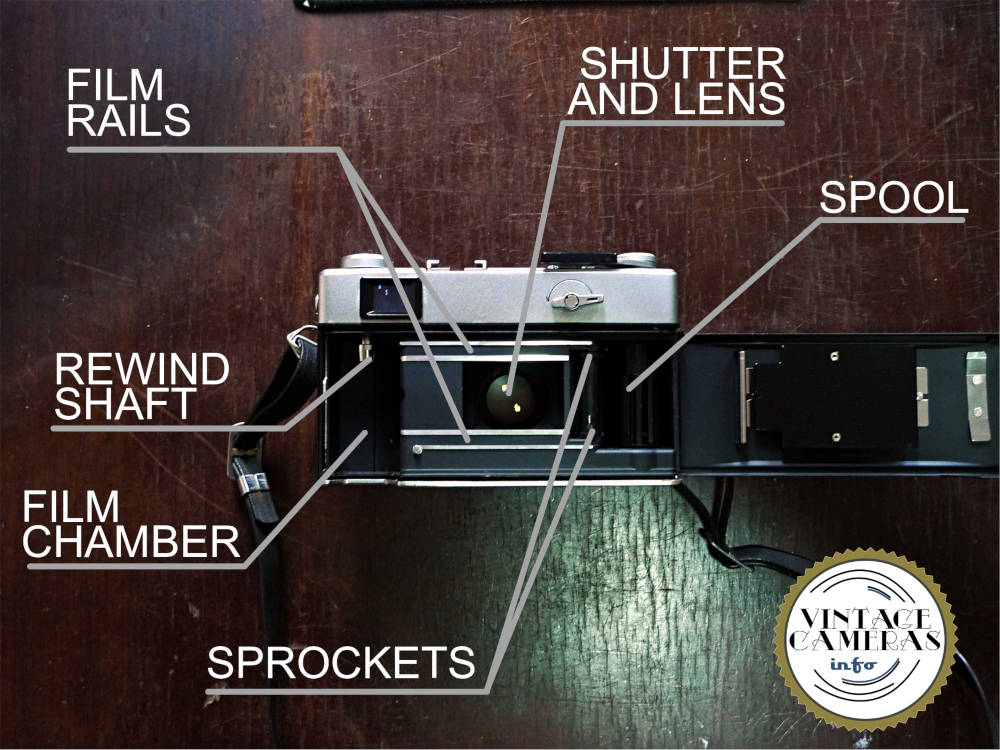
- Pull the rewind crank knob up to open the back cover.
- Insert the film roll into the film chamber.
- Pass the tip of the film over the rails and insert it into the spool hole.
- Turn the spool with your finger from left to right to stretch the film.
- Make sure the holes of the film are fully engaged with both sprockets.
- Close the back cover and pull the film advance lever.
- Press the shutter release button and pull the film advance lever again.
- Repeat step 7 until the frame counter indicates ‘1’. While doing this, check if the rewind lever rotates while the film is advanced. If not, open the camera and start all over again.
- Set the corresponding ISO using the outer ring of the lens.
- Hit the road!
How to rewind and unload film in the Ricoh Elnica 35 Electronic
To rewind the film in the Ricoh Elnica 35 Electronic, press the spool release button at the bottom of the camera body and turn the rewind crank lever clockwise. Keep rotating until you feel the film is free from the spool. Then, open the back cover and remove the film roll.
How to use the timer in the Ricoh Elnica 35 Electronic
To use the timer in the Ricoh Elnica 35 Electronic, first support the camera firmly somewhere, or using a tripod, compose your photo, and adjust the focus. Then, turn the winder lever at the back of the camera 180° counterclockwise. Finally, slide the red button at the top of the camera to the left and run!
How to use the flash in the Elnica Ricoh 35 Electronic
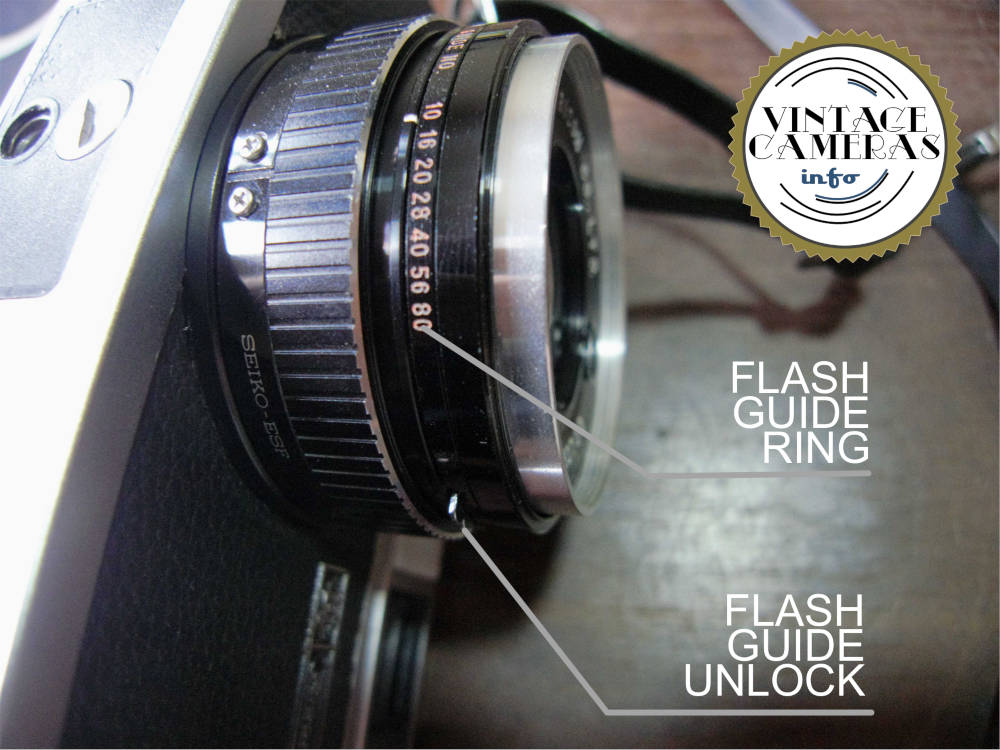
To use the flash in the Ricoh Elnica 35 Electronic, plug it into the hot shoe at the top of the camera or use the plug on the left side (looking from behind). The exposition is selected using the guide number ring in the lens barrel. I would suggest having a look at this article to learn how to use it correctly.
Sample photos
Here are some photos I had taken with my camera. They are amazingly sharp, focus in perfect and photometry is always on point. I hadn’t lost a single photo with this camera. For sure, it is one of my favorites, and had paid less than 10 bucks on it. The photos below were made using Agfa Cinerex 50 film.
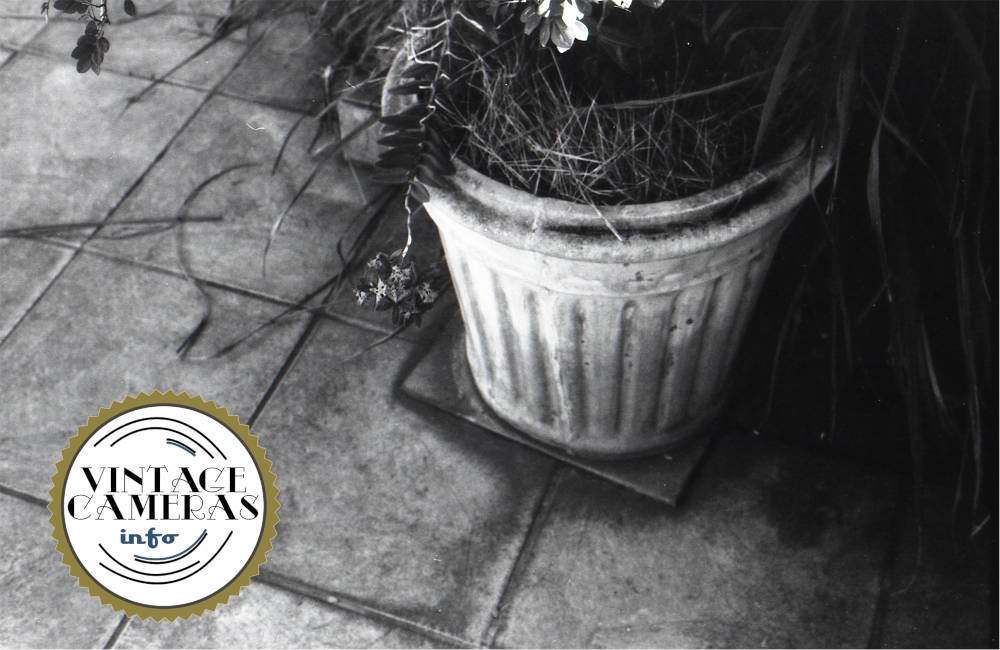
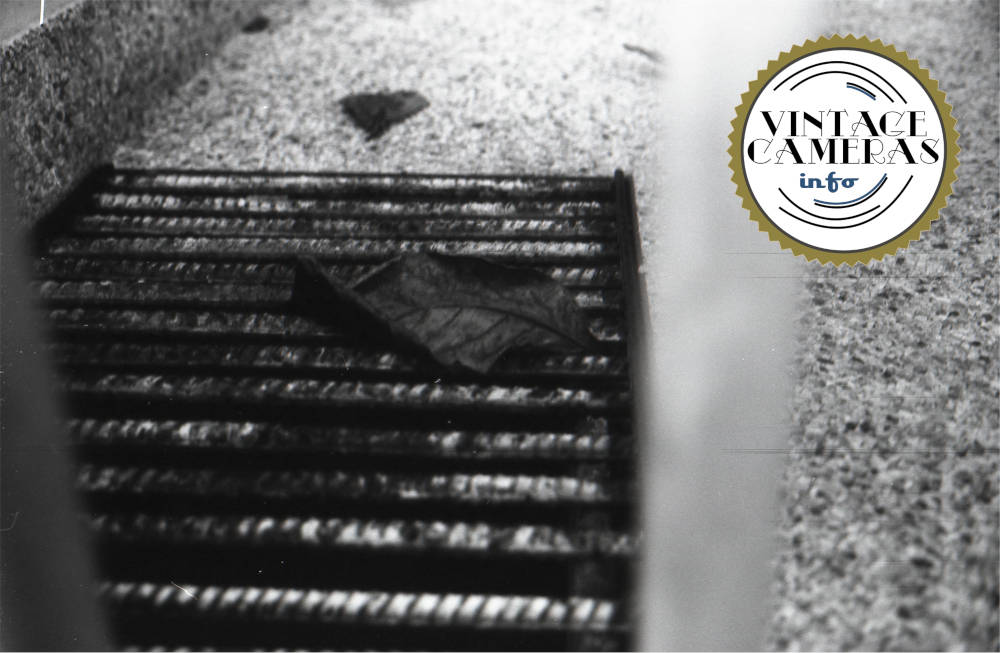
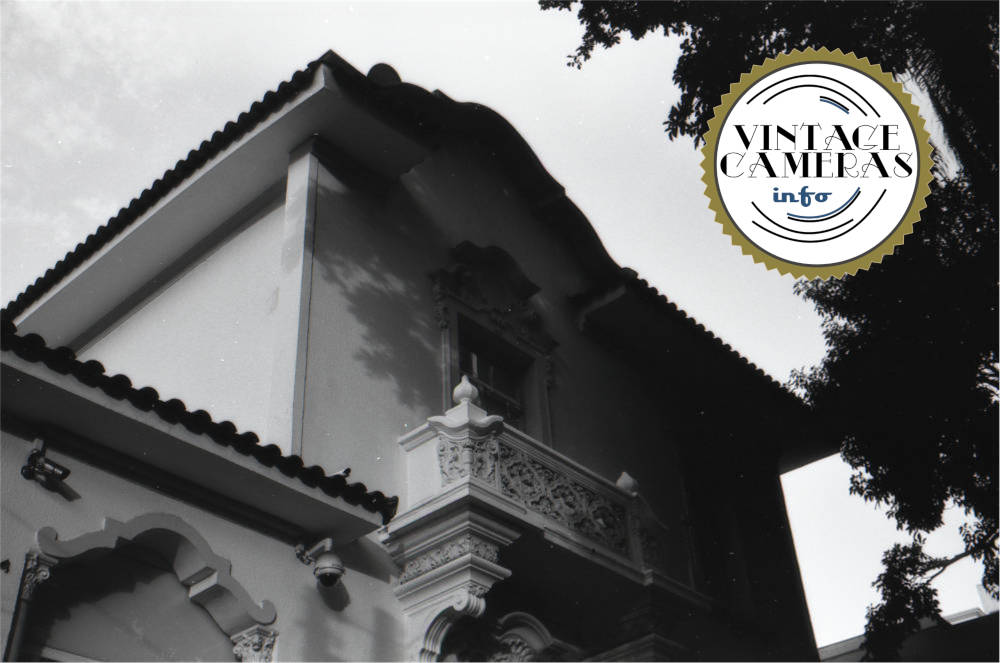
And that is it for the Ricoh Elnica 35 Electronic. If you think this article was useful, please share and comment!