Originally posted on my disabled blog VintageCameras.info
Olympus Trip 35 is a very popular 35mm compact film camera, and it is very simple to operate as will be very clear in this instruction manual. It is light, small, easy to use, and incredibly effective if you know what you have in your hands.
However, the original instruction manuals are often missing and even if you manage to find one in good shape, they aren’t that helpful, as you can see here. I think they are more of memorabilia than a manual, though. For this reason, I wrote this in-depth Olympus Trip 35 instruction manual with various tips and tricks that I had learned over time.
The present camera used in the photos of this article was the first one I took a photo in my life when I was a kid, so many years ago. As a child, I could use it all the time and this is a testament of how simple and effective it is! That said, let’s see how to use the Olympus Trip 35.
Basic parts of the Olympus Trip 35
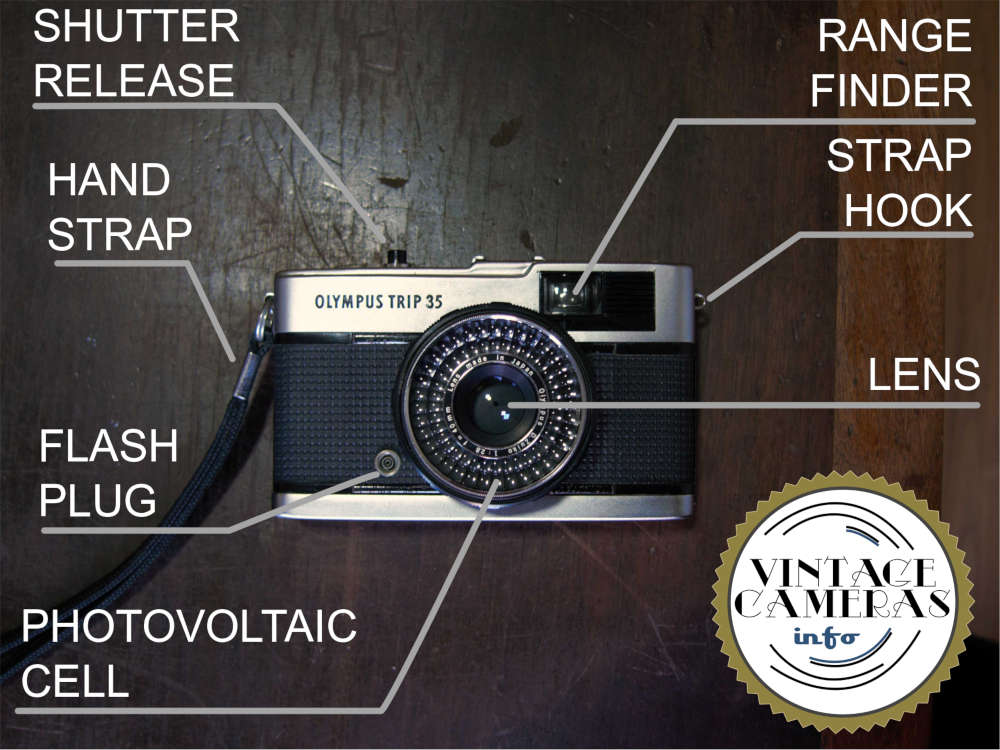
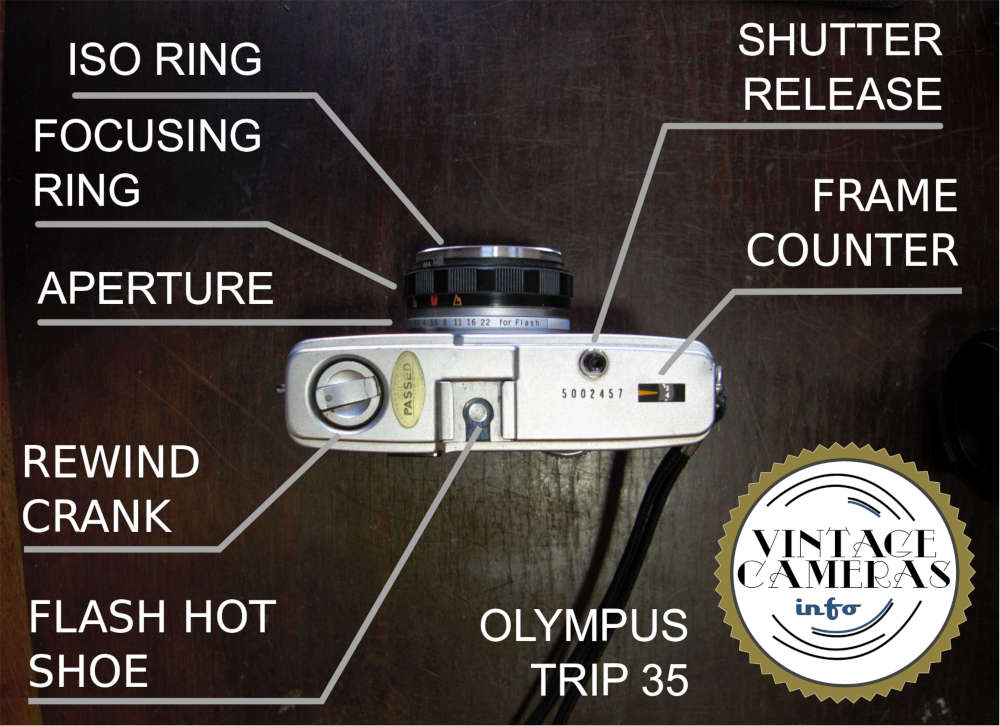
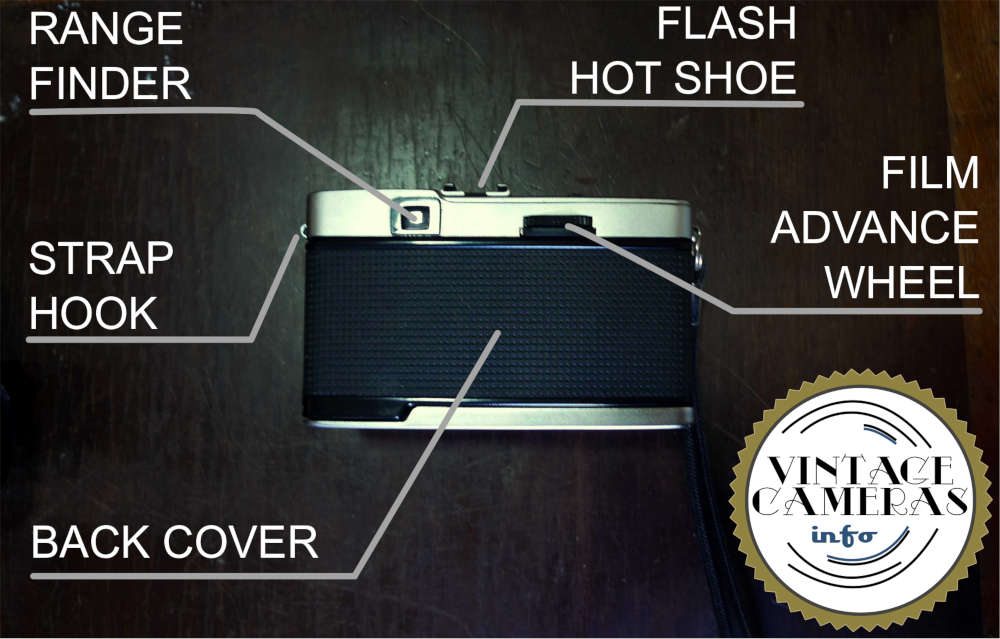
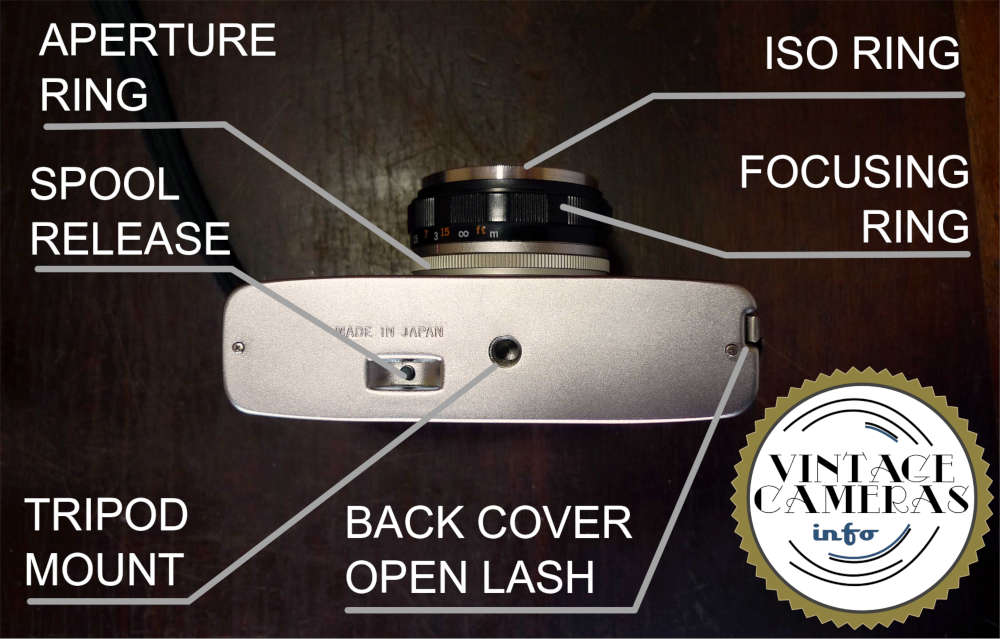
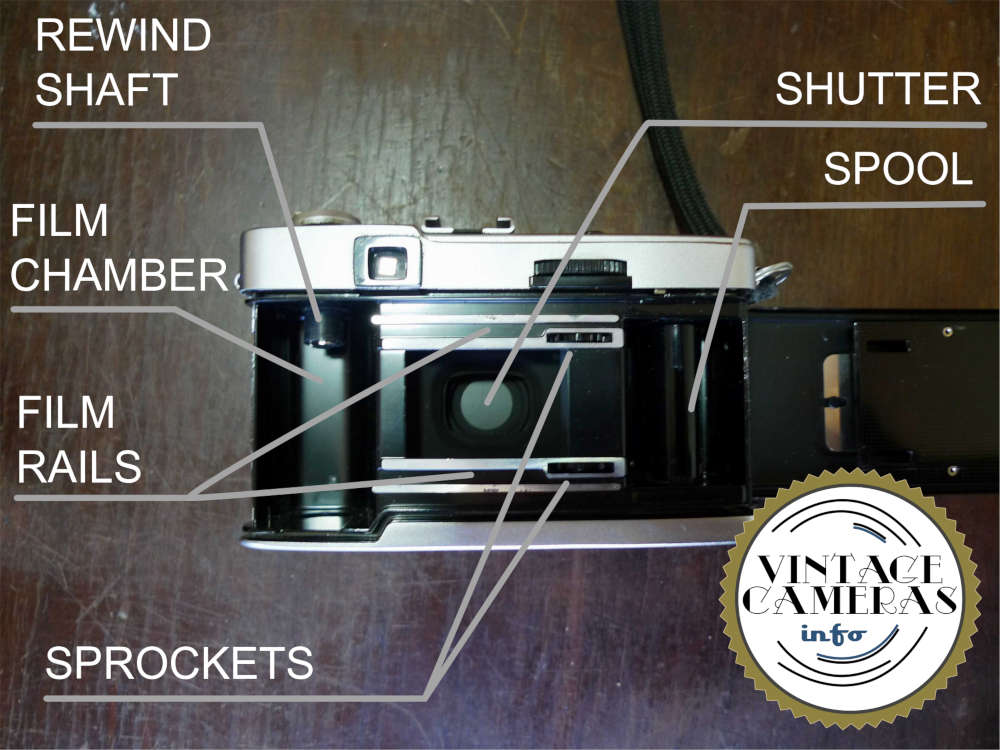
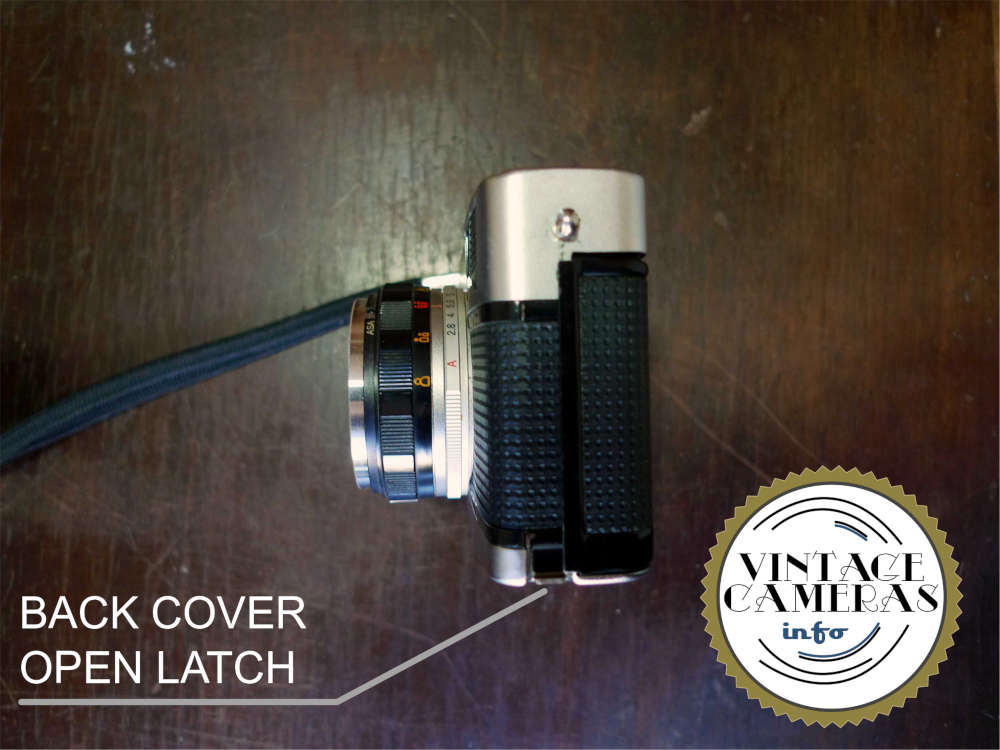
First things first, before we put our hands in the camera itself, let’s have a look at its parts and get used to them. Below are photos of all sides of the camera with the main parts indicated. Spend some time with your camera to identify all the parts and to get used to them since we will be talking about all those parts the entire article!
Operation
The basic operation of the camera is very simple. The inner ring of the lens sets the aperture. It has 7 available values from f/2.8 to f/22. It also has an ‘A’ mode that automatically selects aperture and shutter speed to correctly expose the film. When taking pictures on good light, always use the ‘A’ mode by rotating the inner ring until the red A is aligned with the marking in the barrel.
The next step is to set the focus using the black ring in the middle of the lens barrel. It has 4 positions and is thoroughly explained in the section below.
The Rangefinder
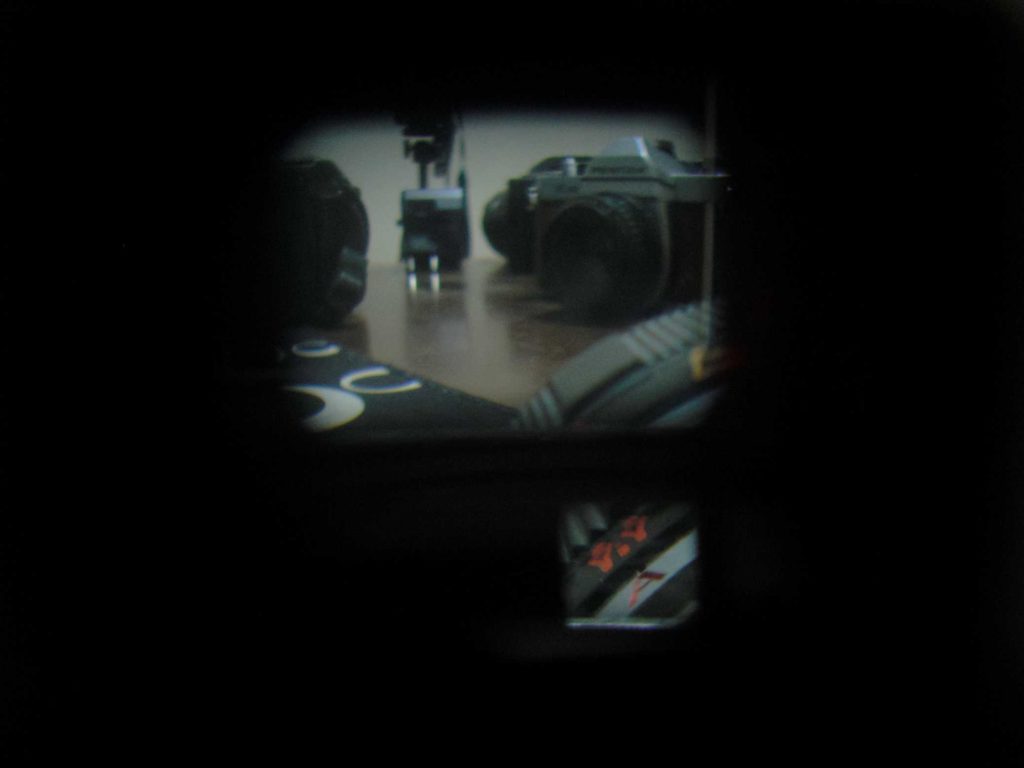
Now, look through the range finder (that window at the back of the camera body) and compose your photo. The rangefinder of this camera is passive, which means you won’t have a preview of focus and depth of field in it. It has only three functions: frame the scene, show the current focus and aperture settings, and display the red flag if there isn’t enough light.
With everything set, press the shutter-release button. If everything goes well, it will make a click and the film advance wheel will be free. Advance the film using this wheel and the camera will be ready for the next photo.
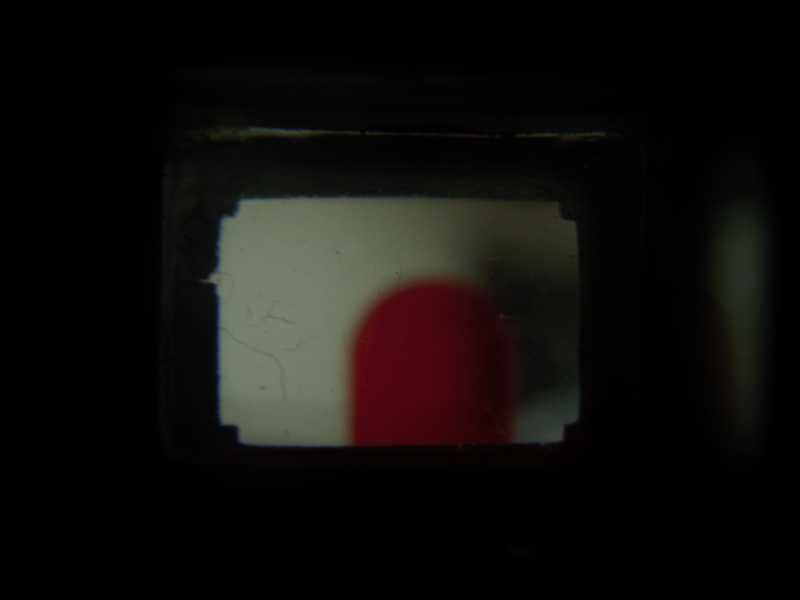
However, if the red flag appears in the viewfinder, it means there isn’t enough light to expose the film and you’ll have to use a flash. This is explained in the sections below.
How to set the focus on the Olympus Trip 35
The focus of the Olympus Trip 35 is set by a focusing ring on the lens, as you can see in the photos at the beginning of this instruction manual. It is a simple system that consists of four indexed positions:
| Focusing Ring Position | Distance from subject | Example of Subject |
| Close-up | 1 meter / 3.3 feet / 1.1 yard | Person face |
| Portrait | 1,5 meter / 5 feet / 1.6 yards | Person face and chest |
| Entire person | 3 meters / 10 feet / 3.3 yards | Entire people from feet to top of the head |
| Infinity | Anything farther than 4 meters / 13 feet / 4.4 yards | Landscapes, very distant subjects |
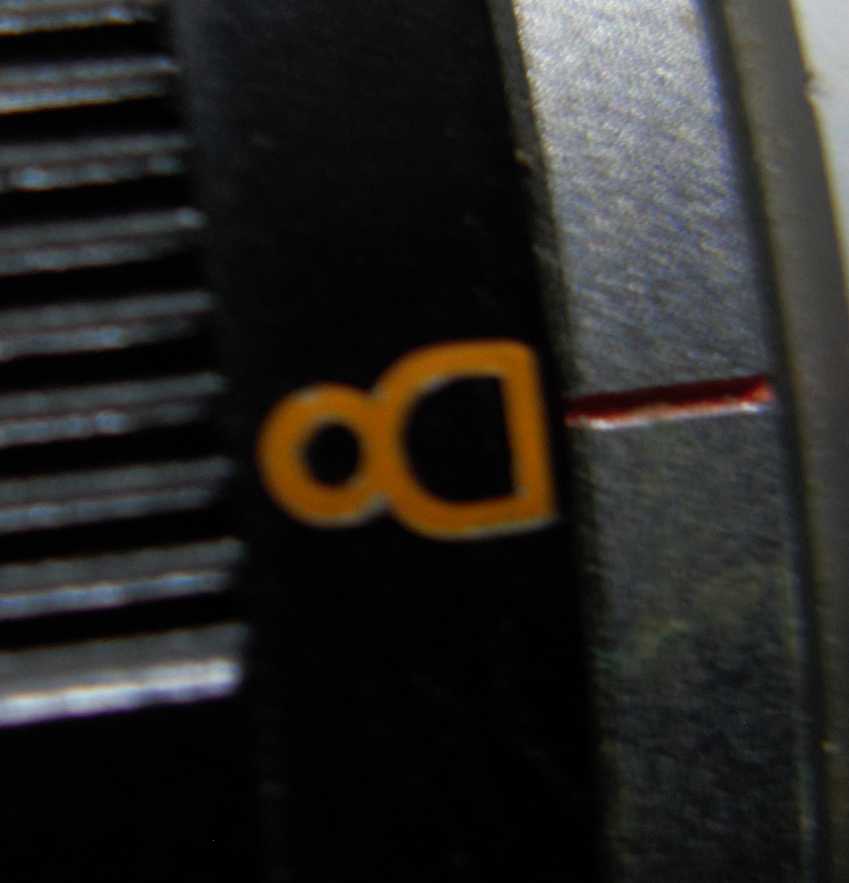
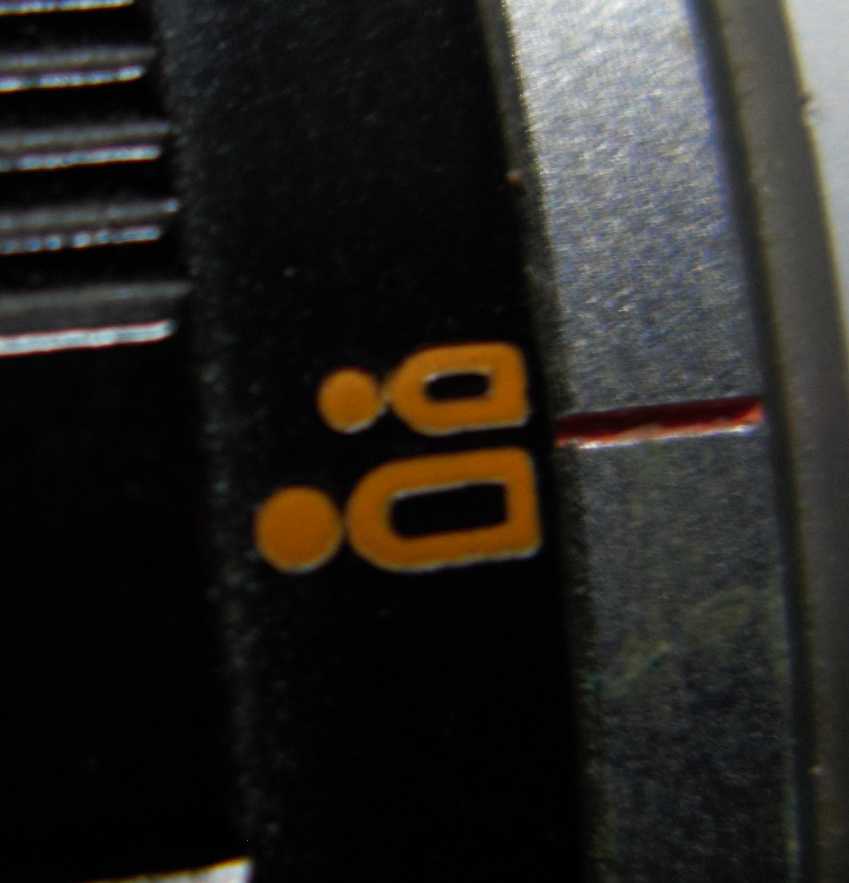
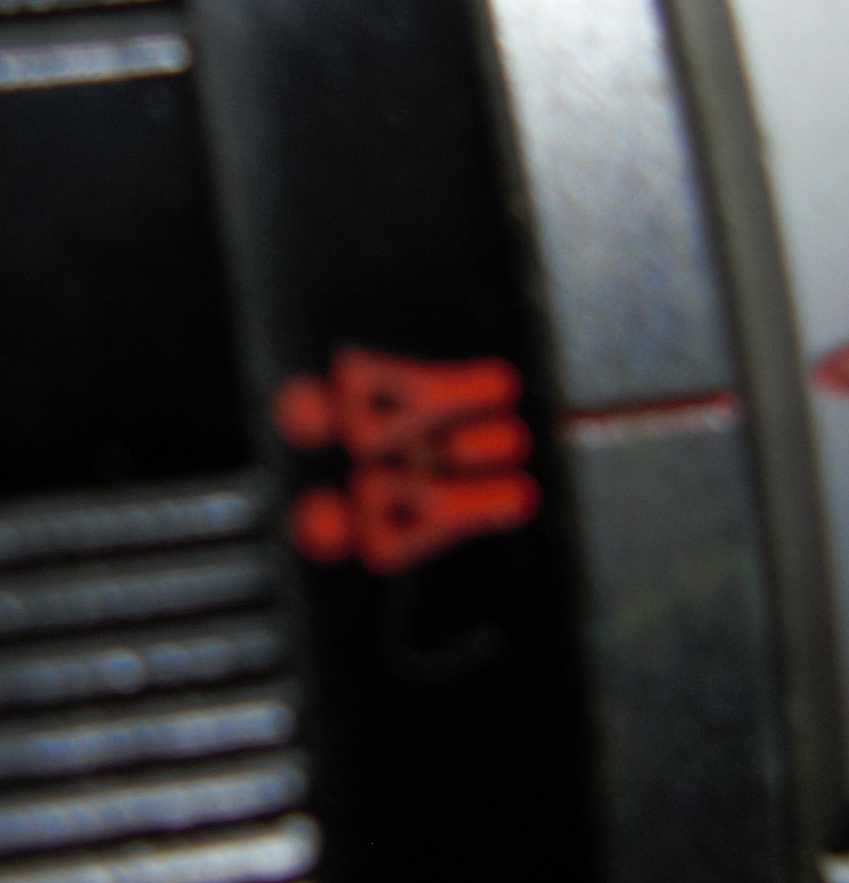
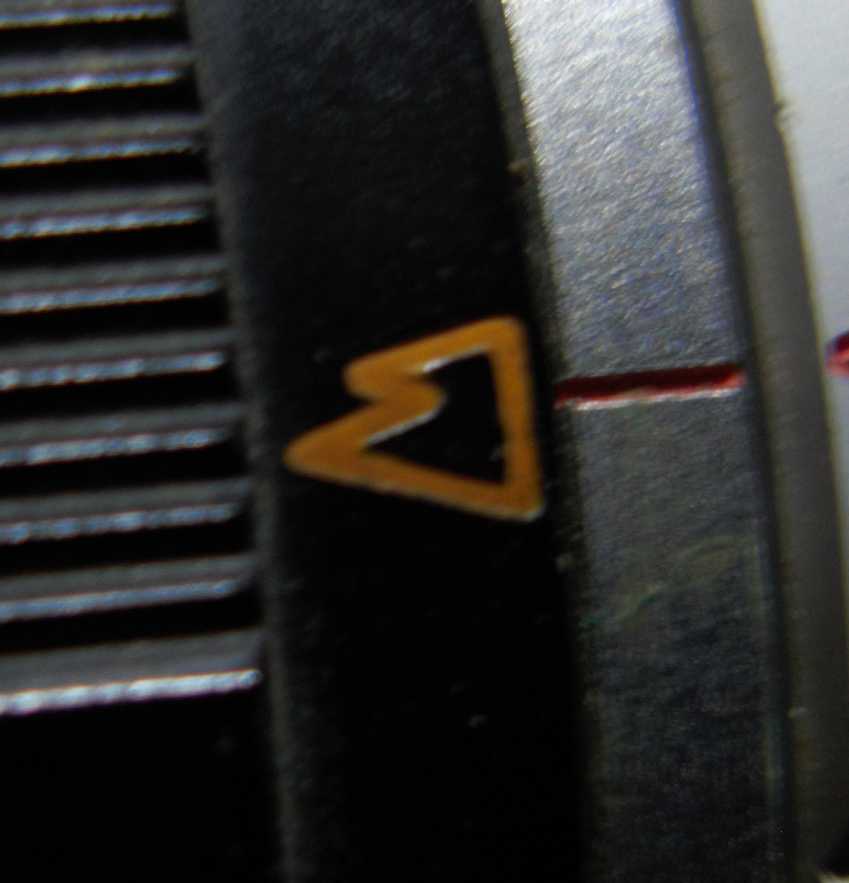
To select the desired position, the icon must be aligned with the marking in the barrel. The positions in meters and are marked at the bottom of the lens barrel.
Focusing tips
It can be a bit difficult to decide the correct focusing position, so every time I am in doubt I take two photos, one for each focusing position. However, if you want to photograph details of close objects it can become really tricky. In that case, it is a good idea to take a measurement of your arm and use it to estimate the distance between the camera and the subject.
Also, it is always the best idea to use this camera in very well illuminated environments since it will tend to close the aperture which, in turn, creates a deeper depth of field that helps prevent focusing problems. Good light is the best friend of your Olympus Trip 35 though, as I am always stressing out in this instruction manual.
Theory of operation and the characteristic red flag
This camera uses a very primitive but ingenious and effective form of Program mode to adjust the exposure. The voltage produced by the photovoltaic cell at the front of the lens is proportional to the intensity of the light that reaches it. Then it moves the needle of a galvanometer that selects one of the 14 possible combinations of aperture and shutter speed.
The shutter operates at 1/40 or 1/100s and the aperture has 7 different positions for each speed, thus resulting in 14 combinations. If none of those positions can let enough light to correctly expose the film, the camera raises a red flag inside the range finder when the shutter-release button is pressed, indicating that it won’t release the shutter. In this case, use a flash.
How to use the flash
To use the flash, just install it in the hot shoe at the top of the camera or use the plug at the front. The synchronous shutter speed for this camera is 1/40 and is selected automatically when the aperture ring is out of the ‘A’ position. Then adjust the aperture of the lens according to the flash application table.
How to load film in the Olympus Trip 35
To load film in this camera is a really easy procedure, but pay attention to some little details. Follow the steps below:
- Open the back cover by pulling the latch that is located on the left side of the camera (looking from the back).
- Pull the rewind lever up so the rewind shaft is retracted into the camera body.
- Insert the roll of film into the film chamber and push the rewind lever. The rewind shaft should engage the film roll.
- Now, pull the film slowly, pass it over the film rails and land its tip into the spool.
- Then, fit the tip of the film into the hole of the spool. Make sure it is firmly secured inside.
- Set the aperture to f/2.8 and press the shutter-release button. Now you can rotate the film advance wheel just a little bit to lightly stretch the film. The idea here is just to feel a resistance in the rotation of the film advance wheel.
- Check if the holes in the film are engaged with the sprockets. If not, use your fingers to adjust it.
- Put a little tension in the film rotating the advance wheel while you close the back lid. This ensures the film is tightly fit inside the camera. Remember, like in step 6, it is just a little stretch. If you rotate the wheel more than, say, 1/10 of revolution, you will be wasting film.
- Now, with the back cover closed, you can rotate the film advance wheel until it locks. Press the shutter release again and advance the film one more time. You should see the rewind lever rotating. If it doesn’t, it means the film hasn’t engaged the spool and sprockets. So, open the camera and try again.
- If the lever rotates while the film is advanced, you did a good job!
- Set the ISO according to the film you are using through the ring at the front of the lens barrel.
It is always a good idea to have a sacrificial roll of film to practice this stuff. Luckily, some cameras I had bought in the past came with old rolls of film inside, so I use them to practice loading film into my cameras!
How to rewind and unload film in the Olympus Trip 35
At the end of the roll, you will feel a resistance in the film advance wheel and it won’t lock. Now is time is to unload it. Here is how you do it:
- Press the spool release button at the bottom of the camera.
- Keep the button pressed while the film is rewinded using the rewind crank.
- Rotate the crank until you fill it is completely loose. If you are not sure, keep rotating until you fill the film is free from the spool, it may take some time.
- Then, open the back cover pulling the latch in the lateral of the camera.
- Pull the rewind crank up to release the film from the rewind shaft.
- Remove the roll of the camera.
Common problems of the Olympus Trip 35
There are three main ways in which those cameras fail. The most common is that the shutter could be contaminated with old oil that became sticky over time. This prevents the shutter locking system to work properly. A CLA might solve the problem, but I would not recommend trying this at home since you can mess the focus adjustment.
The second most common issue has to do with the galvanometer that it has inside. Over time it can also be a victim of sticky oil. In this case, it will work partially and it will be totally ok for most of the time.
The third most common cause is the failure of the photovoltaic cell. In this case, it is really bad news and you’ll have to look for another camera or use this camera for parts.
How do I test the Olympus Trip 35?
A working Olympus Trip 35 will block the shutter if there isn’t enough light. So, to check if it is working, follow these steps:
- Select the Auto mode (red ‘A’ in the aperture ring).
- Rotate the film advance wheel until it locks, so it will be ready to fire.
- Open the back cover, so you can look through the shutter.
- Now, point it to a source of light, such a lamp or the daylight, press the shutter-release button while looking through the shutter. It should click and you will see light passing through the lens while the shutter opens. If it doesn’t click or you can’t see the light passing through, it is not working. In this case, it is not good you should look for assistance.
- If it is shooting correctly, then rotate the film advance wheel again until it locks and be ready.
- Hold the camera in a horizontal position and cover the photovoltaic cell completely with your hand then press the shutter-release button again. In this case, it should raise the red flag and not release the shutter. If it releases the shooter, it is bad news but you can use it as detailed in a section below.
- However, if it worked fine until this point, get it ready to shoot again.
- Repeat step 6 but with the camera inclined 45° downwards. Again, it should raise the red flag and not release the shutter. If the camera is able to release the shutter, it is not good news but it is not the end of the world either. Your camera will work fine in most situations and will underexpose when inclined downwards and super expose when pointing upwards. Mine is in this situation, but I can say that the final result is totally ok.
How to use the Olympus Trip 35 in manual mode
If your camera can release the shutter but the ‘A’ mode is not working, you can still used it applying the sunny 16 rule, and taking into account the shutter speed is fixed at 1/40s, which is good for ISO 50. As a rule, you can use the following table taking into account the ISO of the film and the ambient conditions to define the best aperture:
| ISO | Snow/Sand | Sunny | Slight Overcast | Overcast | Heavy Overcast | Open Shade/Sunset |
| 50 | 22 | 16 | 11 | 8 | 5.6 | 4 |
| 100 | – | 22 | 16 | 11 | 8 | 5.6 |
| 200 | – | – | 22 | 16 | 11 | 8 |
| 400 | – | – | – | 22 | 16 | 11 |
It is a good idea to use a film with adequated ISO to avoid super exposition in well-iluminated environments.
Tips and Tricks
Here are a couple of things I had learned using my camera and I think it is a good complement to the Olympus Trip 35 instruction manual.
Yes, the Olympus Trip 35 can bokeh
I know you have already thought about it. If it has an open f/2.8 lens, it sure should produce very nice bokehs. It can, but it is a kind of a difficult trial and error process. However, some tricks that may help you accomplish this.
Have a look on the photo below. Do you see how I got that nice bokeh? Yes, my friend. Sometimes you have to approach problems by an angle, literally. In this case, if you have flowers, position them in a matter that if your focus doesn’t catch one, it catches the other.
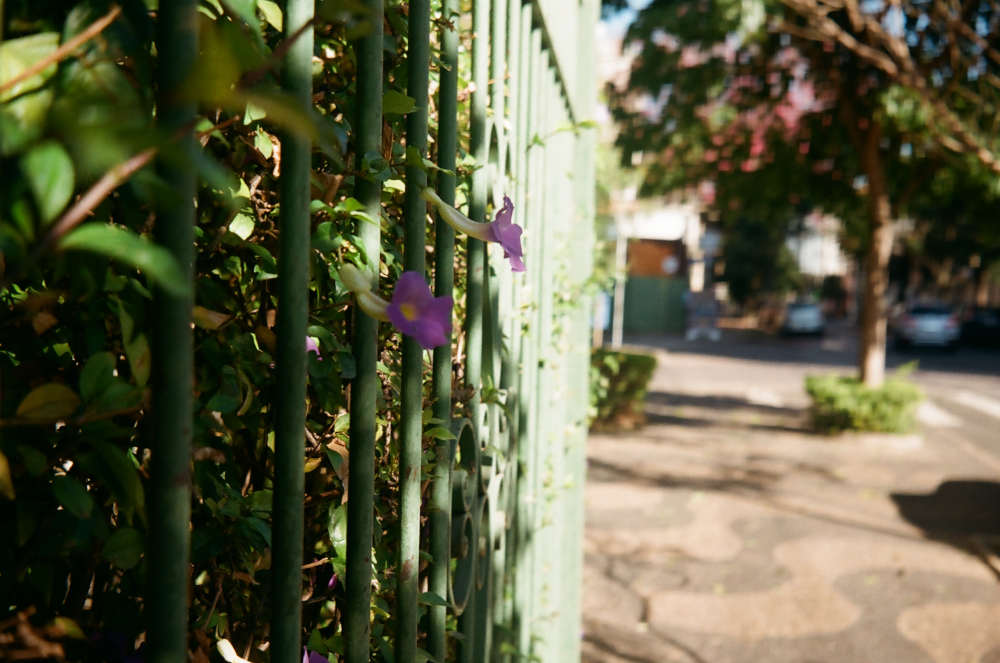
One more trick is to find a less well-illuminated environment. The reason is that the camera will try to open the aperture more, which increases the bokeh. On the other hand, since the depth of field will be shallower, there is a bigger probability that the subject can be out of focus.
However, it was not the case in the photo above, but I used the tried and true strategy of keeping the subject close enough while the background was at infinity. This way, even with good illumination (it was a shiny day in Brazil) I managed to have a deep focal depth near the focus because the camera used a not so open apperture.
Landscapes are where it really shines
Although it has a relatively wide aperture at f/2.8, those compact cameras really deliver the sharpest possible images, something that the Zuiko lenses are really known of. On the other hand, the focusing system is quite primitive and one cannot trust that close subjects are in focus.
However, infinity is still infinity, and if the subject is far enough, everything should be sharply in focus. To get that extra sharpness the Zuiko is capable, use it on shiny days, so it will keep the aperture close and you will get professional-grade photos with a little, simple, and relatively cheap film camera.
Good lighting is your best friend
The best way to compensate for the focusing uncertainty is to make sure the camera will try to use smaller apertures as will always be the case on a sunny day. However, in other instances, the use of a flash is always advisable.
Always check the lens cover
I had lost a million of photos because of this. Since the rangefinder is passive, if the lens cover is in place and the flash is in use, the shutter can be released while the cover is on, resulting in wasted pictures. That is truly frustrating, I can assure you!
Keep your fingers alway from the shutter and the lens
Ok, I know, it sounds obvious. But the reality is that those days people are used to cell phones and their fingers are all over the place. I never care if I am touching the lens of my phone and is always in need of cleaning. The problem is that it affects the performance of the camera and, in the case of the shutter, it can be damaged if touched, so avoid it and always use the lens cover.
That is it for today. If you think this Olympus Trip 35 instruction manual was useful, consider donating via Paypal in the link below, so I can test more cameras and write more manuals to help more people! Thank you for reading!