
Originally posted on my disabled blog VintageCameras.info
I was about to say that the Vivitar EZ 35 is a focus-free camera, but it should be unfair to it. In fact, it is an everything-free camera and an instruction manual for the Vivitar EZ 35 may not have much use. However, I’ve seen some interesting photos people had done with them at Lomography and I think it deserves a place here.
The camera I used in this article has an interesting story. It was issued as a low-cost gift to clients of a big-pharma company at the beginning of the 90s. My uncle worked for this company and had several of them to distribute in 1992.
However, this one was left behind and he kept it until 2020 when he handed it to me after he found I have a collection of film cameras. He didn’t have the original box anymore, but it still came with its original documentation and the panorama thingy. I may digitalize and upload the documentation sometime. That said, let’s see how to use the Vivitar EZ 35!
Basic controls
This camera has the bare minimums to be considered a camera, like a lens and a shutter release button. However, it dares have a flash hot-shoe anyway.

At the top there are the flash hot-shoe, the rewind crank, and the shutter release.

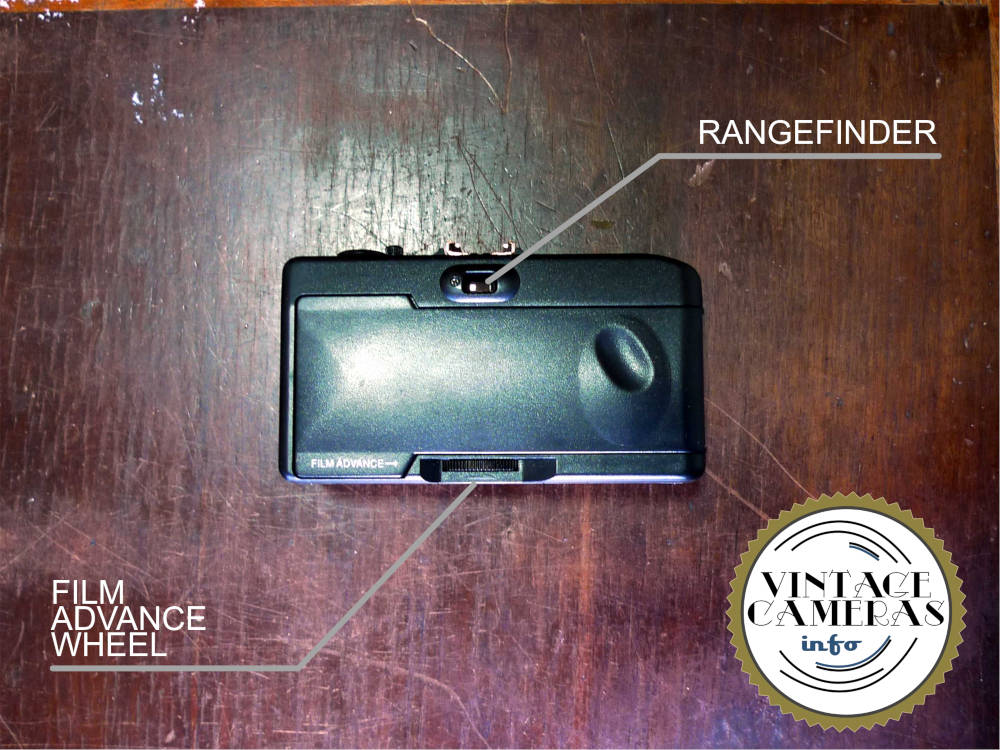
At the back, there are the rangefinder and the film advance button, which is in a very unusual position. However, as will become clear later, this has to do with its minimalist engineering.
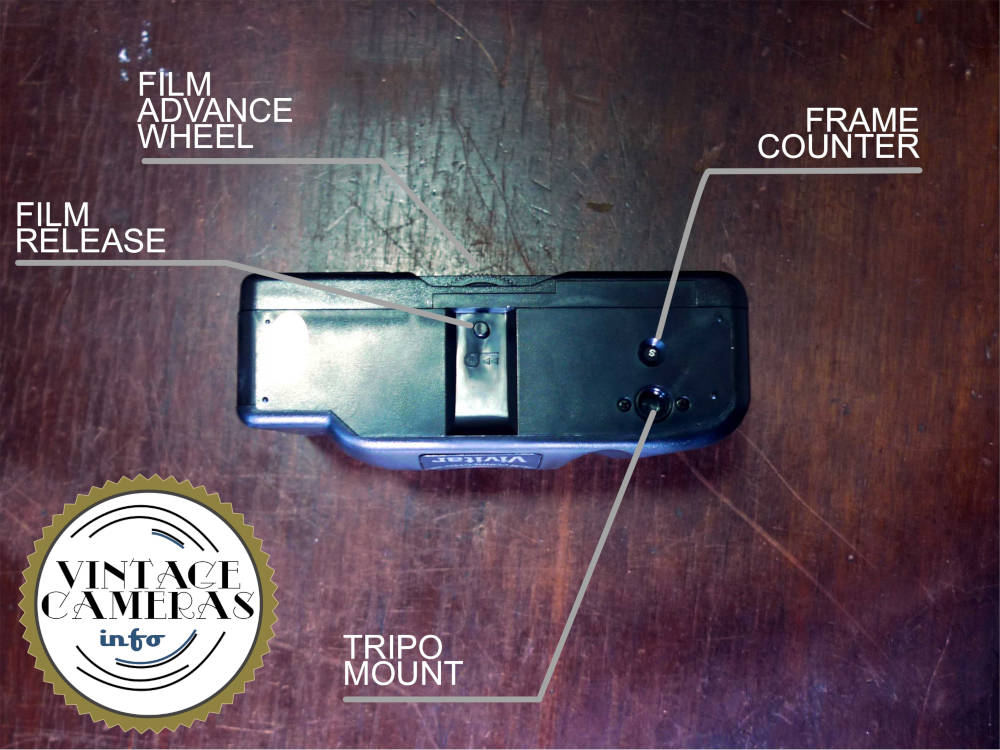
At the bottom, we find the film release button, the frame counter, and the tripod mount. I can’t really stress how weird I think the position of the counter is. The film release button, you know… we use to call it ‘spool release button’, but soon you are going to realize why I changed the name.
And here is it from the inside. A film chamber, a rewind shaft, a single sprocket and no spool. Note that the film advance wheel is aligned with the sprocket, so they may be one piece. This explains its weird position. The same must apply for the frame counter and its strange position.

How to make panoramas with the Vivitar EZ 35
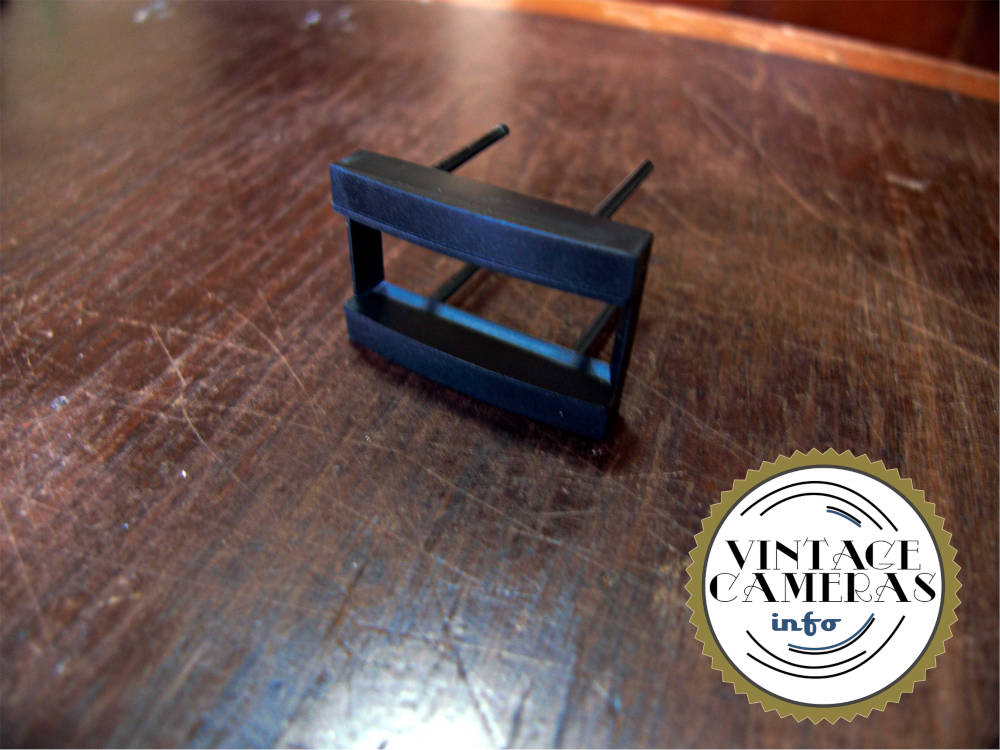
Also worth noting is the panorama accessory. You place it in the shutter chamber, so it blocks part of the film to obtain the 2:1 panorama ratio. To use it, just insert this piece and you are good to go. However, you can’t remove it easily if the film is already in. Nothing is perfect, though.
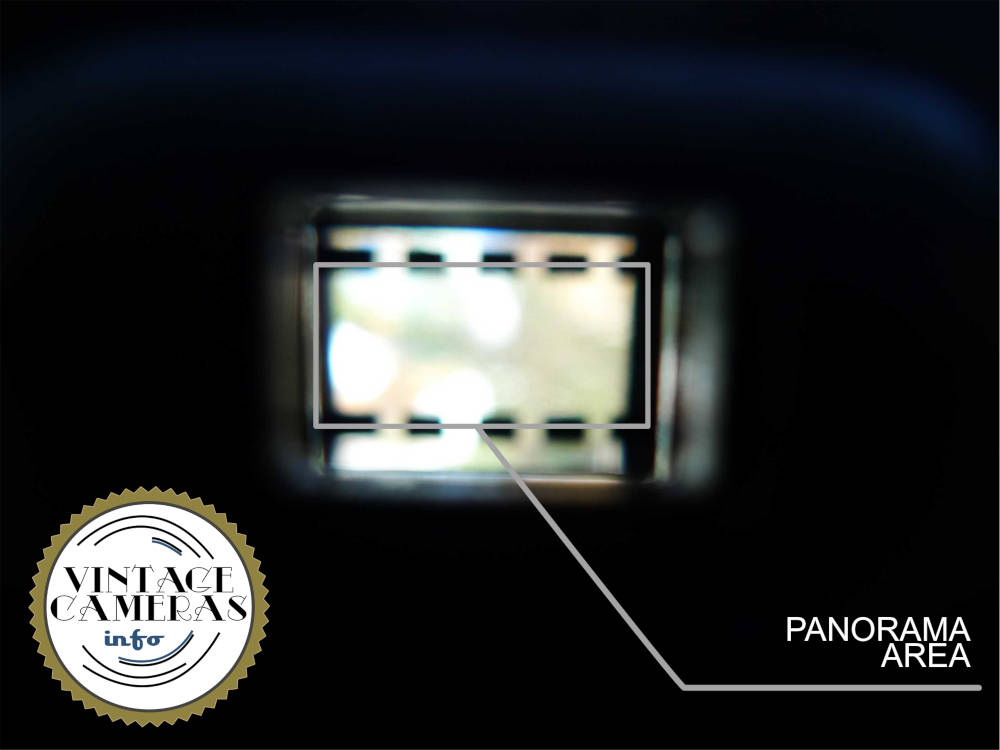
And if you are going to shoot a panorama, always make sure you fit the scene between the dashed lines in the rangefinder.
How to load film in the Vivitar EZ 35
To load film in the Vivitar EZ 35 is an effortless process. Follow these steps:
- Open the back cover sliding down the latch at the side of the camera.
- Pull the film rewind crank up to keep the rewind shaft out of the way.
- Insert the film in the chamber and pass it over the rails.
- Make sure it is engaged with the sprocket’s teeth.
- Press the shutter release and use the advance wheel to stretch the film a bit.
- Close the back cover.
- Done.
This camera is so simple that it lacks even the ISO adjustment. I didn’t test it, but to be safe I would use a low cost 200 ISO film such as the Kodak ColorPlus 200.
How to rewind and unload film in the Vivitar EZ 35
To rewind and unload film in the Vivitar EZ 35, follow these steps:
- Press the film release button.
- Turn the rewind crank clock-wise until you feel the film is free.
- Open the back cover using the latch at the side of the camera.
- Pull the rewind crank up to free the film roll from the rewind shaft.
- Remove the film.
I must say that I have developed some respect for the simplicity of this machine. I think I will try something with it soon.