The documentation of artworks, especially in a large format inside buildings, is a very difficult problem to attack, if not impossible at times. Besides most limitations being related to spatial constraints, such as lack of enough distance to properly photograph, there is also the fact that a huge number of artworks are executed directly into the walls of the buildings, such as frescos, and mosaics, paints, and minor decorative sculptures. The same problem, of course, is found in archeology, where the unearthing sites are, by their nature, limited spaces to work with. The photographic record is further complicated because the paintings may be made on curved surfaces, like domes and arches.
The main limitations of this type of photography can be reduced to two factors: perspective and resolution. Stained glass panels, for example, are usually placed on tall walls, which can only be seen from below. The perspective of the viewer is always placed from bottom to top. To photograph a frontal view of such work would require placing the camera aligned along the center of the panel, which may be several meters from the ground. This would require scaffolds or even a drone, which, in turn, would imply a temporary closure of the site. On the other hand, due to their large dimensions, it would need an enormous amount of pixels to properly register all the small features. This can be solved by stitching several photographs together, but this technique may lead to distortions at the seams and from small perspective differences from the original photos.
In the last years, a technique has become more and more accessible, which is photogrammetry. The idea is that one can create a 3D model from a set of regular 2D photographs. These models not only capture the spatial features of the object but also preserve the surface images. Since large panel-like artworks are, in fact, 3D objects with a 2D painting on them, they can be modeled as a 3D object, rotated to compensate for the perspective, and then rendered into a final product, which can be an orthomosaic, for example. Also, as opposed to sculptures, panel-like artworks do not produce occlusions that may affect negatively the model, so even an incomplete set of photos, standing from the ground, is enough to create a usable model.
On the downside, photogrammetry requires a lot of computational power and dozens of photographs. Some panels, depending on the number of photos, may require a full day of processing time to reach a final 3D model. At times, the model proves hard to do numerically converge, yielding non-sensical results. However, I have been finding that most of the time, the results are pretty good.
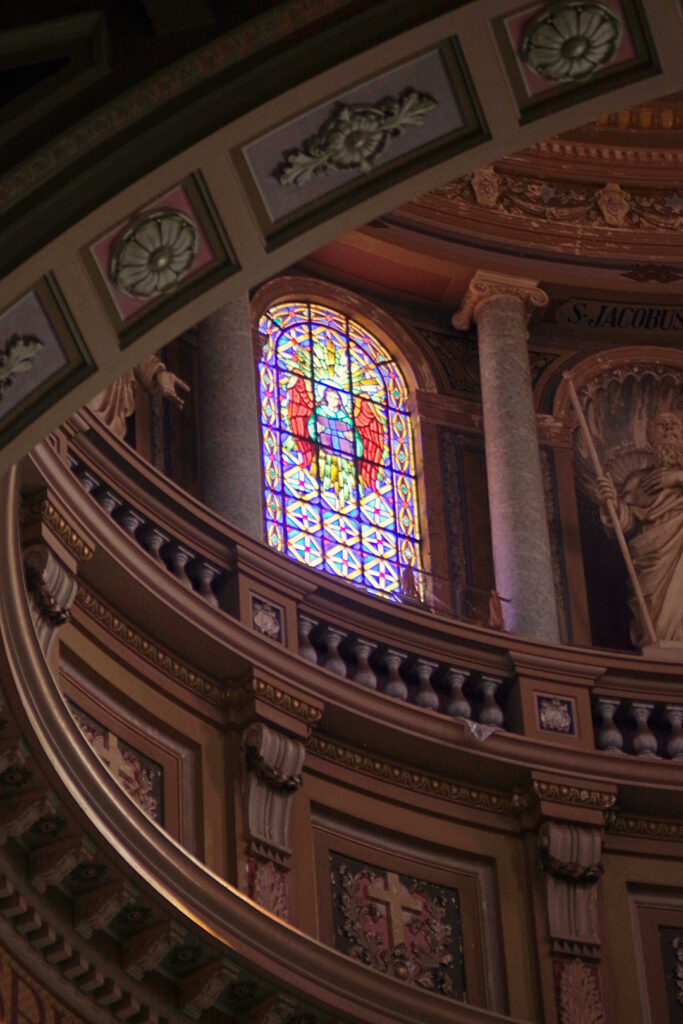
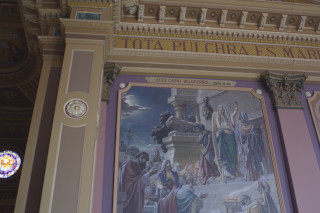
The following study was conducted in Santo Antônio de Pádua Basilica in Americana), and in Nossa Senhora do Carmo Basilica, in Campinas, both in Brazil. Below is a photo from the Santo Antônio Basilica that I took on the same day that the photos were collected for the 3D model.
Methodology
The methodology is the same as used in regular photogrammetry of 3D objects. All the processes can be made in free software, and I used Meshroom, Blender, and GIMP. The work pipeline goes as follows. First, we must collect enough photos with a regular camera, handheld or on a tripod, taking a good representation of the panel from several angles. Then, we process the 3D model using Meshroom. After that, we can manipulate the model to create high-resolution renderings using Blender. The final product is obtained by fixing problems and improving the renderings using Photoshop, GIMP, or similar.
Photography
The photography technique is the same used in regular photogrammetry. Photos are taken from several angles with an overlap of 60 to 80% between adjacent images. The idea is to have photos that can be stitched together by the 3D solver, so we must have a good number of features present in photo pairs. Also, to properly capture the 3D aspects of the object, the photos must be taken with a reasonable variation of perspective.
What works great is taking photos from three spots in the ground, varying the angle from bottom to top and from side to side. I imaginarily divide the panel into rows and columns and photograph them from this perspective. Then, I shift my position sideways, preserving my distance from the panel, and repeat the process. Doing this from three to four angles is usually enough.
The resolution of the model will be affected by the details of the photos. So, it is a good idea to match the focal length to the desired resolution. Photogrammetry is known to yield a sub-pixel resolution, but it is a best practice to not rely on it. Be aware that taking too many photos can be a pain to compute the model. The ideal number of images is a topic open to debate.
About the camera parameters, just follow the best practices to obtain sharp images with no background or motion blur. ISO must be kept as low as possible to avoid noise, as always. However, photographing inside buildings, especially historical ones, is challenging due to the low light conditions. So, be aware that some models can only be made by employing a tripod. Stained glass, on the other hand, has the advantage of being lit from behind, so choose times of the day where illumination is optimal. And, as the last tip, we are not taking artistic photos, but technical ones. We need sharp and noiseless images, not pretty images. Also, the composition is not a thing here. Another suggestion is to use the hyperfocal technique to avoid unnecessary blur.
The file format we are going to use is usually JPEG. Meshroom cannot deal with raw files (DNG, PEF, etc.). Since we are not going for artistic photos, I would recommend tweaking the camera settings to get all the images processed right out of the memory card. It is worth spending some time dialing in the colors, sharpness, and contrast beforehand. The sharpness and contrast affect the final result much more than colors, which can be tuned later in Photoshop. Noise isn`t a big deal for photogrammetry, but it is for the final product. So, keep it as low as possible, always.
Smartphones can also be used, provided that only single-sensor modes are employed. The reason is that modern phones stitch together the images of several sensors to achieve one photo with high resolution or wide-angle or zoom, etc. However, this stitching deforms the images and creates artifacts that affect the 3D model. If your phone has more than one lens at the back, be aware of that. Also, phone lenses are usually very wide, which leads to huge barrel distortions that are corrected with post-processing, degrading the image quality. However, although it may not become a high-end product, photogrammetry with smartphones can yield good results.
Meshroom
In this work, the photogrammetry software used, as already said, is Meshroom. You can download it here. Its main advantage, which is also a major flaw, depending on who uses it, is that it has a lot of parameters that can be tweaked. While it allows the refining of the model, it can also run into convergence problems. So, be aware to not mess up too much with it.
The feature detection algorithm can be selected from a list, but the most used is the SIFT (which is almost a standard in photogrammetry), Akaze, and DSP SIFT. The latter has some advantages over regular SIFT but takes a lot more time to compute. I use it only when SIFT can`t do the job. Akaze, however, may not be suitable for this application because it is great with borders but not with textures.
On the hardware side of things, you are going to need a computer with an Nvidia GPU and, at least, 12 GB of ram. A good CPU will yield much faster results. Other brands of GPU won`t do it because Meshroom requires CUDA, which is an Nvidia proprietary technology, to run. My setup is an Intel Core i5 11260H with 12 GB of RAM and an Nvidia RTX 3050 GPU. It has been enough to handle the application. If, however, you don`t have an Nvidia GPU, you can try MeshroomCL, but it is slower and much more limited than the original version.
Blender
Blender is one of the most popular software for 3D photo-realistic scene rendering. It works like a virtual studio, where lights, cameras, and objects can be placed to create photo and video shots. In this project, the 3D model created in Meshroom can be arranged in a scene into Blender in such a way that the camera is looking directly into it. This way, a photo-realistic rendering can be made, simulating a real photo taken from an impossible angle in real life. In short, what is being done here is creating a virtual environment with the digitized object, and then simulating an ideal photographic situation.
Blender also offers a very comprehensible list of camera options. Between them, is the possibility of simulating orthographic projections, i.e., poses that don’t take perspective into account. This way, all tridimensionality can be removed from the image, and the resulting product is just like a copy of the original.
Finally, Blender enables us to render the images using ray tracing, which creates a photo-realistic reproduction. It uses the textures and the 3D model generated by Meshroom, along with a sophisticated physics engine to tackle the task, and it allows the user to define the resolution of the rendered image. In some cases, it is possible to create pixel counts as high as 1 terapixel, giving that memory is available and the quality of textures is enough.
GIMP
The very last step is the usual image treatment techniques for digital photography. To this, I used GIMP, which is an open-source alternative to photoshop. However, only minor contrast and sharpness adjustment were made in these images. The 3D models aren’t perfect and, sometimes, there are holes and other defects in the images. This can be readily repaired using image restoration techniques.
Judith
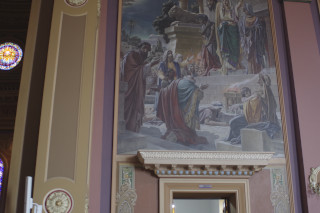
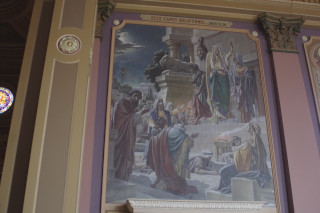
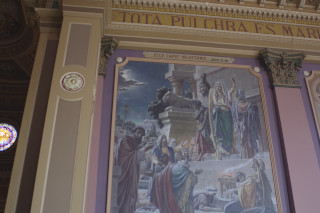
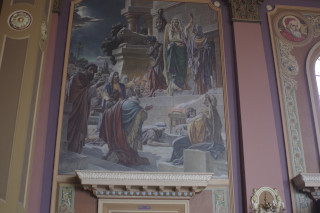
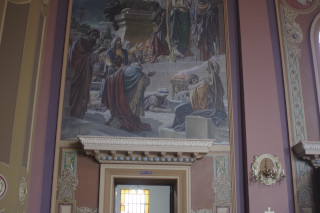
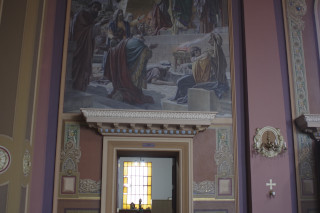
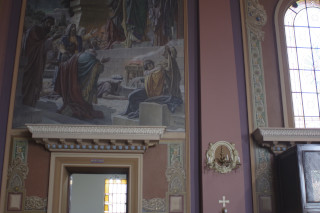
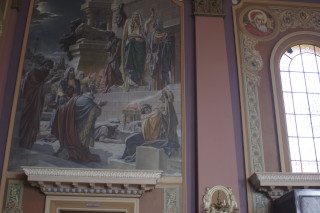
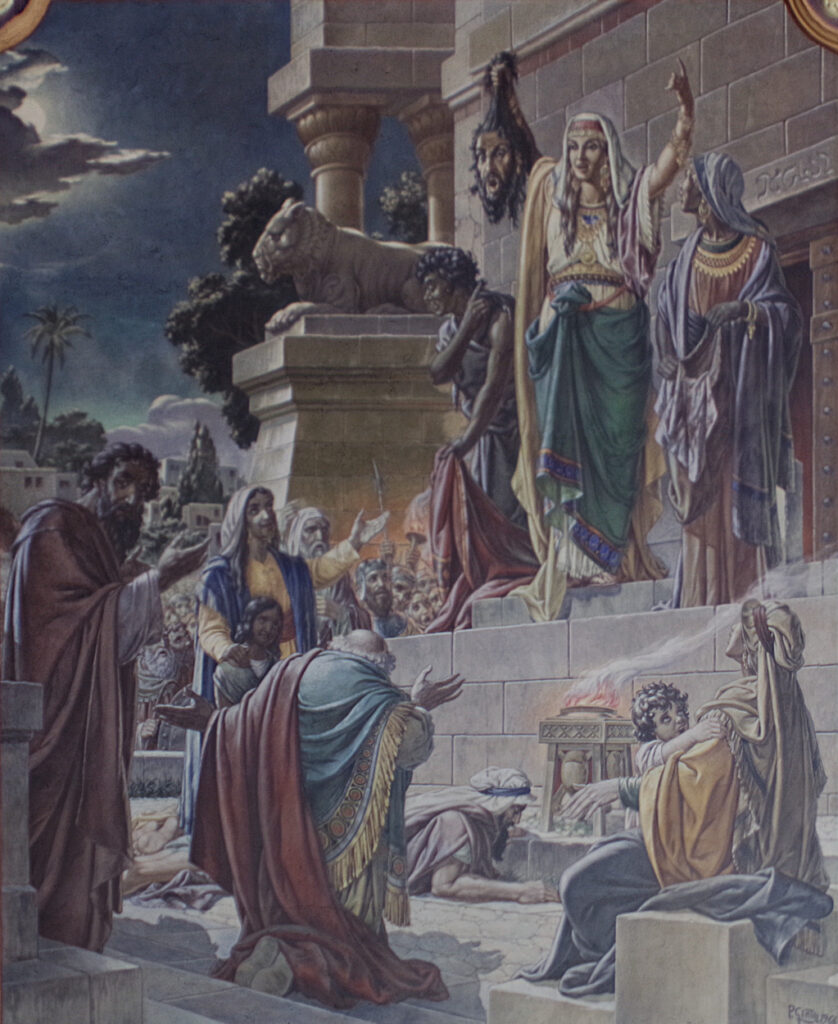
The Santo Antônio Basilica was built in the 1960s, and the painting was charge of Pedro and Uldorico Gentilli, two Italian brothers. The cultural heritage of this Basilica is huge, and its beauty and craftsmanship are comparable to the best Roman churches. The potential work that can be done with this technique in there is enormous. This was the main reason I chose it for the initial tests. Inside the basilica, there are a great number of paintings, but for this study, I used the one that was easier to photograph, which is a scene from the Old Testament, when Judith brings the head of Holofernes back to the Jewish city.
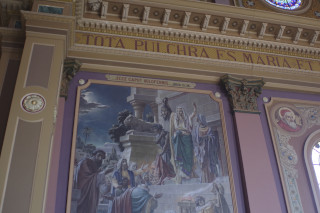
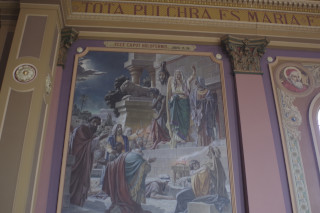
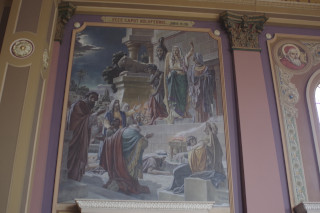
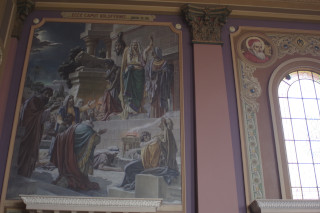
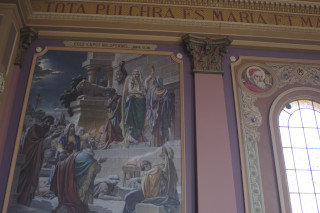
A total of 17 photos were taken at three angles, as I previously described earlier. The camera used was a Pentax K-70 DSLR (24 megapixels, APS-C) with a Sigma 28-300 mm lens. The parameters were focal length at 28mm, f/3.5, ISO 800, and shutter speed 1/40s. The images were processed by the camera that generated the high-quality JPEG files. The color profile was purportedly chosen to be neutral, while sharpness and contrast weren’t enhanced. ISO 800 was used due to the lack of illumination. Also, photos were made handheld, so I had to avoid excessive slow shutter speeds. Although the Pentax camera is known to handle high ISOs very well, photos are on the brink of decency, to say the least. Below is a sample of the images. This is the perspective that someone on the ground may have of the painting.

Below are miniatures of the 17 original photos, so one can have a glimpse of the angles and the overlap between them. Although 17 images are a quite small group for photogrammetry, it yielded a very good result, as will be seen later on.


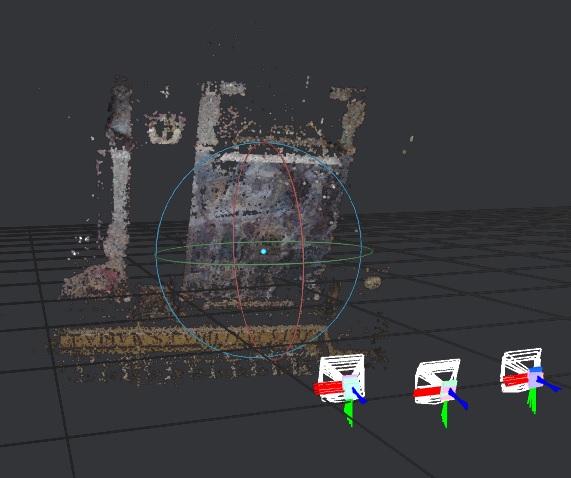
The photos were imported into Meshroom, using all the default parameters with SIFT descriptors, except that the total points in the mesh were reduced to 2.000.000 to avoid memory problems. Also, the Mesh filtering node was replaced by a denoising node, which improved the flatness of the painting surface. The processing time consumed about 2 hours.
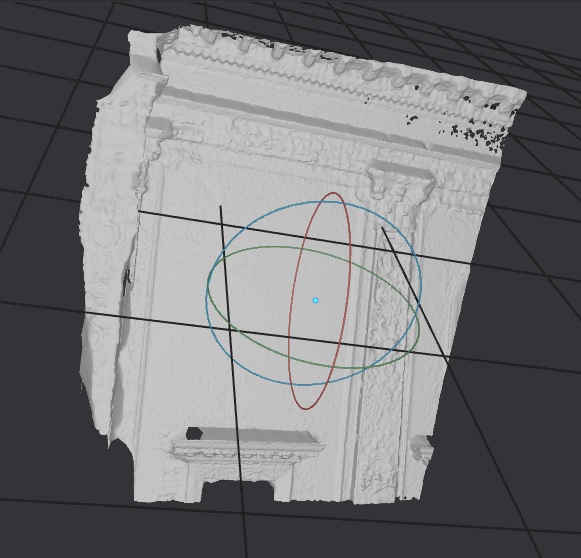
Below, is the points cloud, the 3D model, and the textured 3D model. The first is a rough reconstruction that serves the purpose of locating all camera positions and creating the sketch of a hard object. The 3D model is made by improving the points cloud through depth maps and then connecting the points with a mesh. The mesh is denoised, resulting in the plaster-like image at the center. The 3D features themselves are not great in this model because there weren`t enough photos to reproduce them. However, they were never intended to, since The flat part of the painting was my initial target. The last image is the final reconstruction with the original images projected into them.
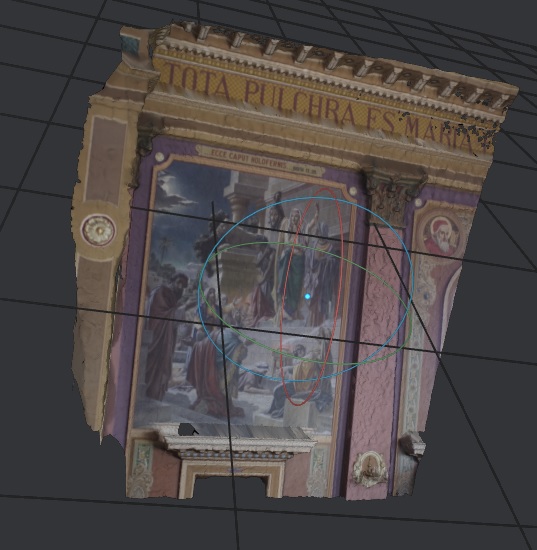
The textured 3D model is, then, imported into Blender. The model is positioned among the camera and a distant point light source to create the final scene. Both the camera and the light source are positioned in the normal axis that passes through the center of the image. This way, the painting can be seen head on. Lastly, the camera was set to orthographic mode, to further eliminate any perspective from the photo. The image was rendered using 1920 x 1080 pixels, which was enough for social media purposes. However, much higher pixel densities can be achieved, if desired. Below is a video of the model being manipulated in Blender.
The image below is the final product of the entire process. Although it was only a first rough attempt, results are quite good, actually. All the proportions seem to be correct, colors are good, details are rich, but can be improved with better photos. This image can be used for prints, social media, books, art cataloguing and documentation, etc.
Recovering unexpected details
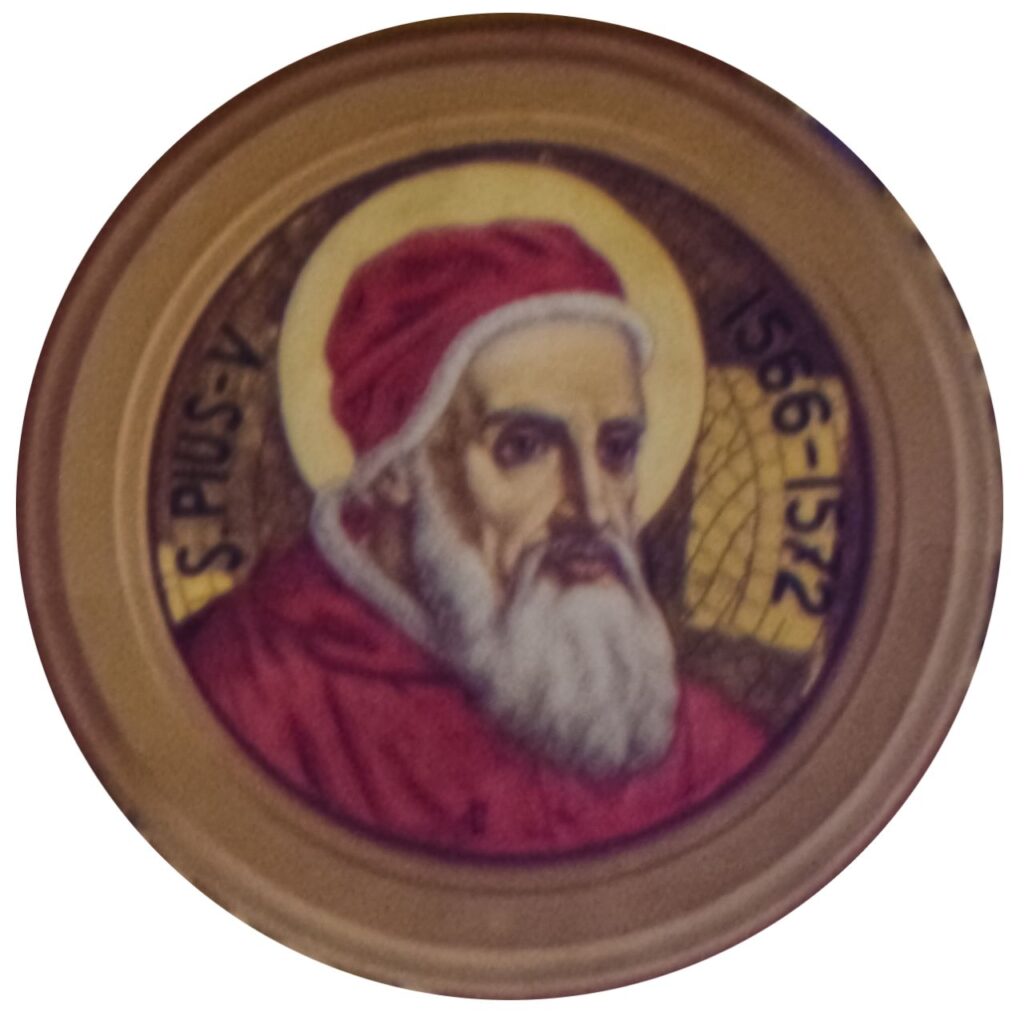
The model works so great that we can even retrieve unintended details from it. Below is an orthophoto from the portrait of Saint Pius V that was on the right upper corner of Judith`s frame. Amazingly, it is only present in a few original photos, but Meshroom could get it right. Taking into account that this set of photos weren’t that good, the result turned out pretty nice!
Stained glass from Nossa Senhora do Carmo Basilica
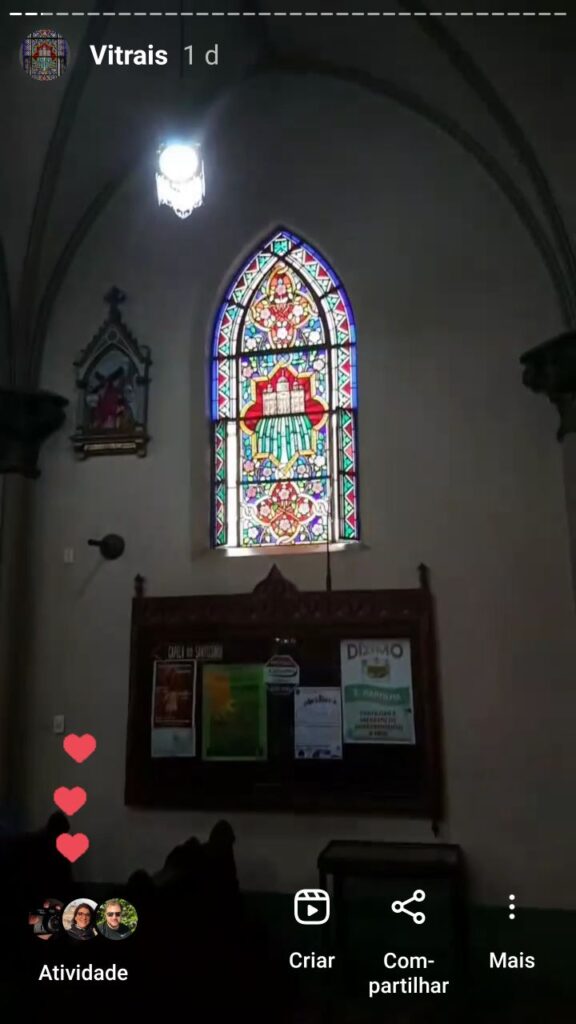
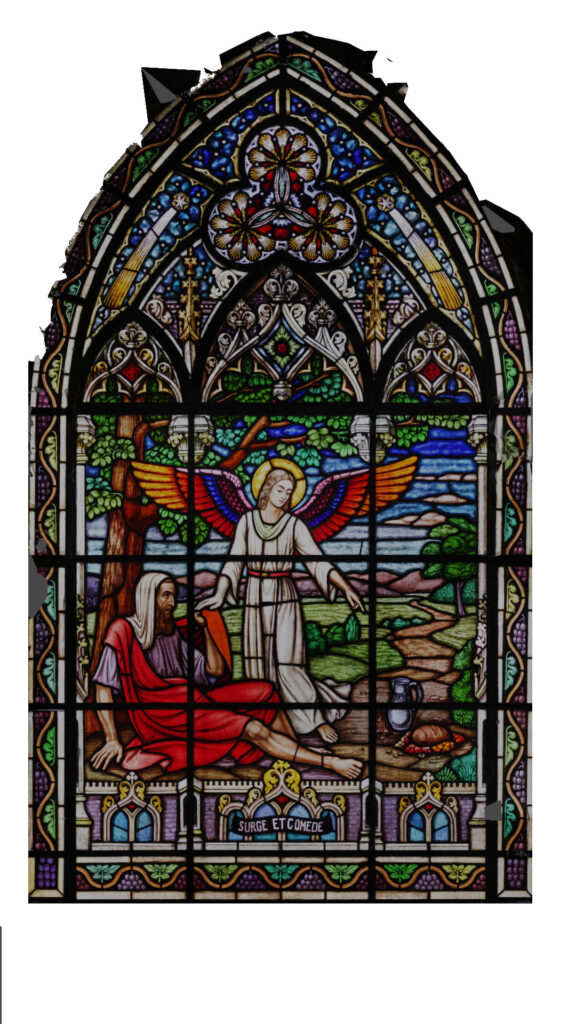
After the great results from Santo Antônio’s Basilica, I decided to try some stained glass panels at Nossa Senhora do Carmo Basilica, in Campinas. The first is located at the entrance, on right. It can be seen in the picture below, which is a typical view someone has of it.
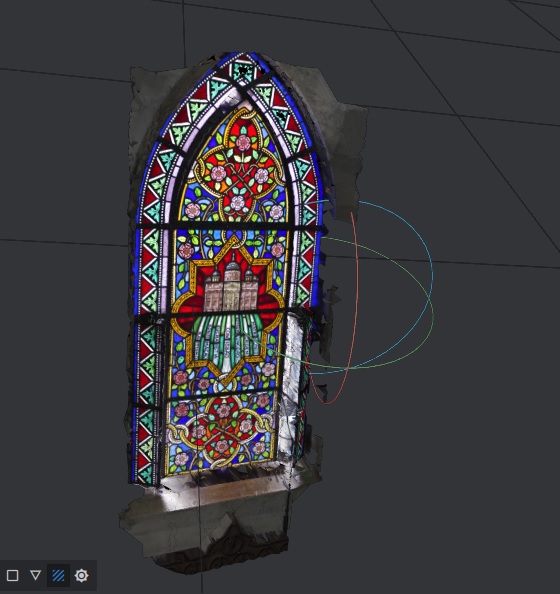
This time, however, I decided to go a bit further with the resolution, so I used a Pentax-F 80-200 mm lens that is way sharper than the Sigma I used before. A total of 38 photos were taken with f/4.5 and ISO 800. The focal length used was 80 mm, which allowed me to grasp a lot more details. The image below is the resulting 3D model n Meshroom. This result was, in fact, great.
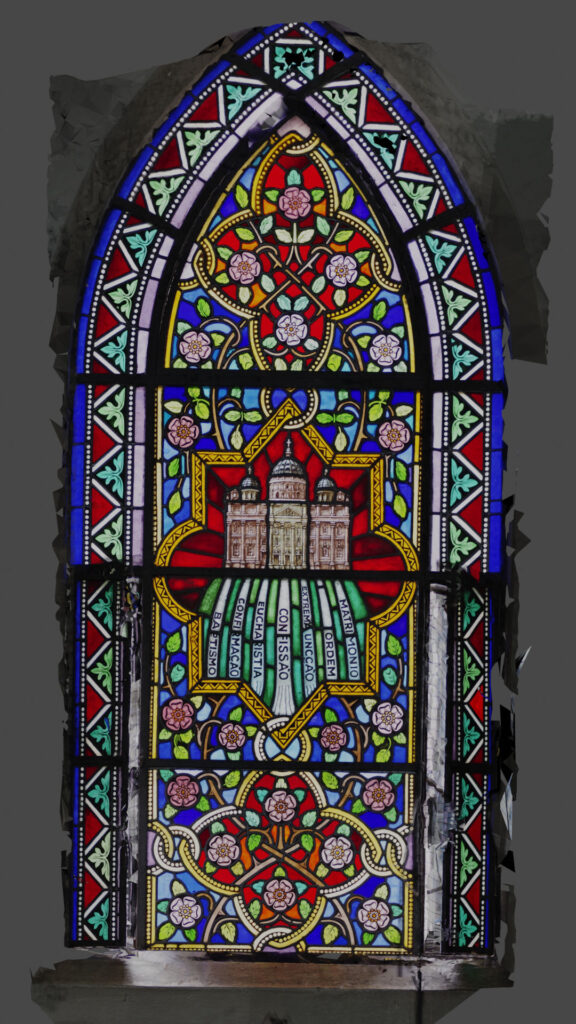
The only defects in the image are due to two openings on the sides of the panel that folds outwards for ventilation purposes. Since they were open, they appeared tilted in the model. This could be easily avoided by just asking someone to close them, so no big deal. As a matter of proofing, the technique works just great. Below is the final rendering in Blender at 1920×1080 pixels.
To test the actual resolution of the model, I proceeded to render a new sample to 96 megapixels, which is the maximum I can do on my computer. The image below was cut from this rendering. The level of detail is simply amazing.
To further illustrate the actual resolution of the photo, here is a very fine detail down to the pixel of the image above. Taking into account that the photos were taken almost 5 meters always from the glass, it is quite respectable. It would be impossible to have a similar result with a single photo, even on a scaffold, and use pixel shift or any other technology to increase pixel density. It is worth noting that, on my estimates, it is possible to go as high as 600 megapixels until all the original photos details are exhausted. The limitation is the RAM it would take to do so.
For the second stained glass panel, the story was a bit different. This panel is located in a place of constrained dimensions. The room is less than 3 meters wide, while the panel itself is larger than this. So, it is virtually impossible to see it at a glance and without perspective. Let alone photograph it with conventional techniques.
This time, however, I went for the maximum detail possible. I was close to it and used 120 mm of focal length, which gave me high detail crops. A total of 196 photos were taken and, after discarding some that didn`t reach the desired quality or were too far off in exposure, 178 photos were imported into Meshroom. The first results were quite disappointing, and the model was having a hard time converging. However, after half a dozen tries changing the sampling parameters, I could get some promising results. Here is the points cloud of a partial result.
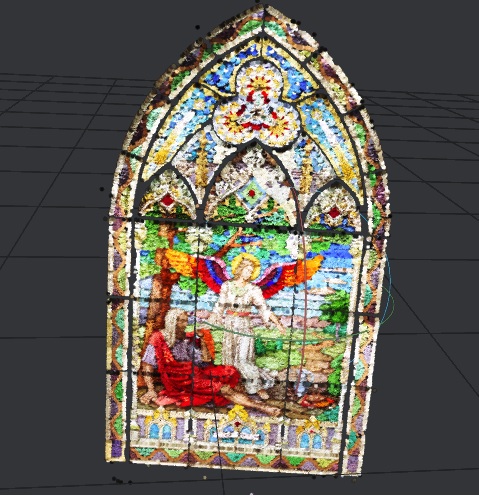
And here is the model after texturing. Looks great from far..
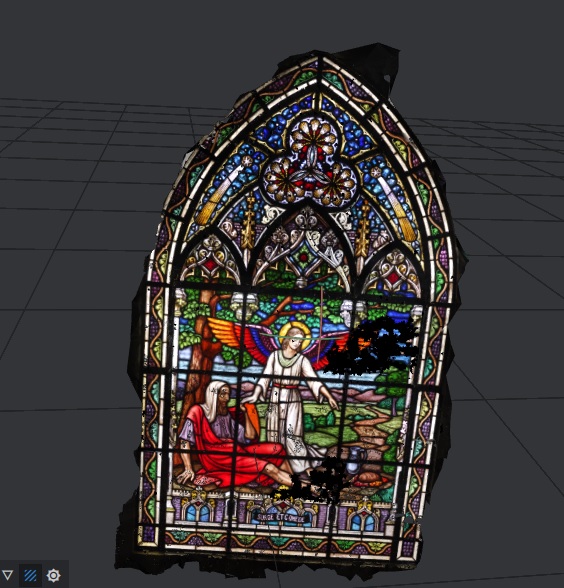
… but there are huge defects when looked closer. This lead me into investigating what would be going wrong. So I reached the conclusion that there was too much information available to the solver because, at some times, it believed there were two distinct panels in the model.
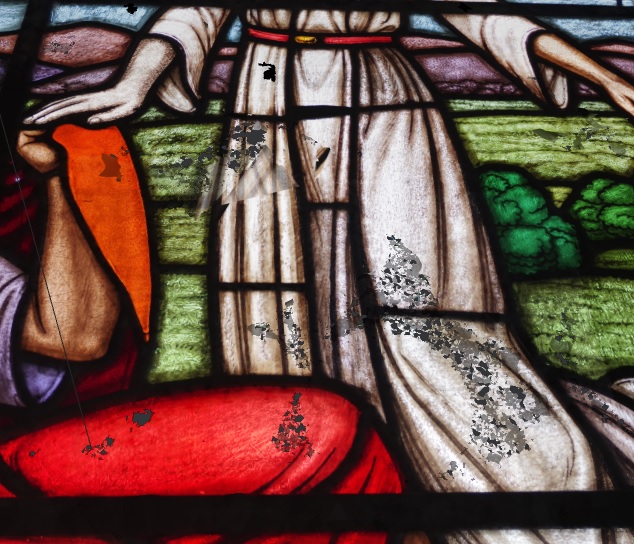
Next, I reduced the number of images a little more, and decreased the number of features to low. The final image is the one below.
Besides some minor defects, the level of detail of this image is stunning. On high-resolution renderings (which I could not retrieve due to a Blender crash – excess memory usage maybe) it is even possible to see the brush strokes in the glass.
What comes next?
The purpose of this article was to demonstrate the viability of a method to create high-resolution orthomosaics of works of art of large proportions inside buildings, and I consider it to be successful. The technique still has its shortcomings, but they are outnumbered by its advantages. More research and the possibility of working in a proper environment, and taking the necessary time to create high-quality photos with low ISO would result in great orthomosaics. Shortly, I hope to have the authorization to make a complete work in one of the Basilicas.