Originally posted on my disabled blog VintageCameras.info.
The cheapest way to get good lenses for your DSLR is to find vintage cameras with premium glass, and this is especially true for Pentax. Since it was one of the most important manufacturers until the 90s, there are lots of cheap lenses everywhere. Also, it is not a popular brand nowadays, so most of those lenses are forgotten and devalued. Can you see the opportunity there?
So, when I was choosing a DSLR to buy, I discovered that Pentax bodies are backward compatible down to the first K-mount released in 1975. So, we have more than 40 years of lenses being delivered to the market with less interest than popular brands such as Nikon or Canon. That was a decisive fact in the process of buying my Pentax K70.
As soon as I bought the K70, in Italy, I started searching for classic lenses. Since I was used to a Nikon P510, I missed the extreme zoom that the stock 18-35mm can’t reach on an APS-C sensor. At the time, I found a Sigma 28-300 mm for sale. The downside was that it was attached to a Pentax Z1 body and I had to buy both to get the lenses. The Z1 introduced me to the world of film photography, which is a story for another day.
However, the Sigma was in very good shape and needed just some cleaning to be back in business. But truth is, I found it to be excessively soft and the resolution was poor enough to be matched by the Nikon P510. Well, at least it did what it was supposed to be, but every photographer, after having some long focal distance will need some fast 50mm.
Back in Brazil, I discovered that there were lots and lots of old Pentax cameras for sale and I started buying them to collect the lenses. In fact, I bought so many cameras that I had the collection that inspired this blog.
In this process, I had bought lenses from the original K-mount up to more modern KAF-mount. All of them were compatible with the K70 body, but not without some drawbacks. So, I decided to share the practical knowledge using vintage lenses on a modern Pentax DSLR.
I am using a Pentax K70 body on this article, but I think most of Pentax bodies of today are very similar, so it may also apply for best bodies such as the K1, the K2, and the KP.
The basics of Pentax K-mount
Prior to the introduction of bayonet style lenses, the standard was the M42 screw lens. In this system, the lens is just screwed into place and the camera drives the lens aperture diafragm through a button in the back of the lens barrel. When the shutter release is pressed halfway, it engages the lens button, the aperture closes and then the light is metered.
Although this system has the advantage of always provide accurate metering and depth-of-field preview, the shutter may be too heavy and accidental releases are always a small mistake away.
So, Pentax invented a way to overcome all the disadvantages of the M42 system. First, the screw was replaced by a bayonet, in which there are some teeth that engage the camera body firmly. In the M42 style, to attach the lens required several turns until it was firmly in place, and there was always the risk of screwing too tight or too loose. In the bayonet system, it was always perfectly engaged every time.
The second most important feature was that the aperture wasn’t actuaded mechanically by the camera body anymore. Instead, it was always kept open and the camera has a small latch attached to a resistor that decodes the aperture selected through the lens ring. That’s why most of Pentax base models didn’t have the depth-of-field previews, such as the K1000 and the ME.
There is a second latch that is responsible for operating the diaphragm. When the lens is attached to the camera, this latch forces the lens to be fully opened. However, the aperture selection ring acts as a stop for the selected aperture. When the lens is released, and the latch is not under pressure, you will see the diaphragm closes.
So, the Pentax K-Mount works by reading the selected aperture through a latch and when the shutter-release button is pressed, it releases a second latch that allows the diaphragm to close up to the desired position.
Why this is important for using vintage lenses on modern Pentax DSLRs? Because they lack the mechanism that senses the aperture o the lens. In modern DSLRs, this is achieved through electrical contacts in the lens mount. So, when using a lens designed for the original K-mount, we will need to get around the exposure somehow.
How to set up a modern Pentax DSLR for vintage K-mount lenses
The modern Pentax DSLRs use an updated bayonet system called KAF-mount. There are several of those standards that include more options, such as the KAF2, KAF3, and KAF4. Since the Pentax K70 is one of the later models, it is compatible with the KAF4-mount down all the way to the original K-mount, but there is a catch. There is a thorough article about all the lenses and mounts in this article from Wikipedia.
Tha KAF-mount cameras lack the aperture sensor pin, so the camera body can’t see the selected aperture in K-mount lenses, such as the Pentax-A series. So, to be able to use the camera in these cases, we are going to need to change some settings.
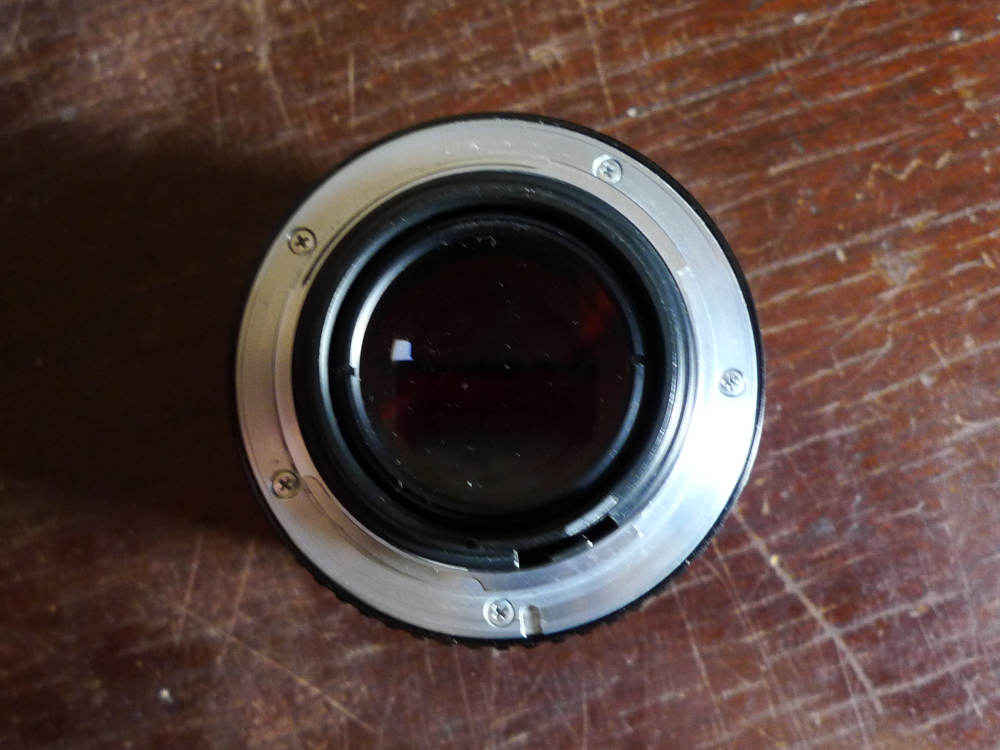
To identify Pentax K-mount lens, you must look for three things. The first is that it lacks an automatic aperture setting. The focus is also manual, so it won’t have any motor engagement and, third, they don’t have any electrical contacts.
That said, let’s see how to setup the Pentax DSLR to accept the older K-mount vintage lenses.
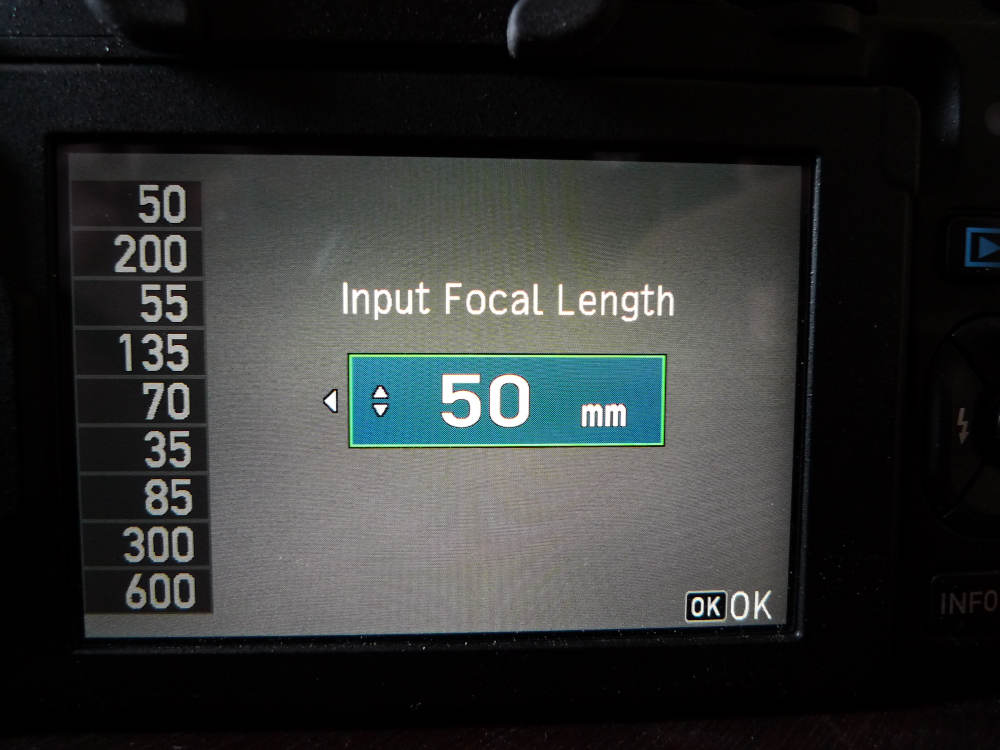
1. Insert the lens and set the focal length
Install the lens on the camera body as usual, since all Pentax mounts are mechanically compatible. When the camera is turned on, it requires to insert the focal length of the lens. In this case, as I am using a Pentax-A 50mm f/1.4, I am going to insert 50mm. I don’t think it has any effect on the camera except the metadata of the photos.
Then, you are going to notice the camera can’t recognize the lens aperture. In standard configuration, as it cames from factory, the camera won’t shoot if it can’t determine the actual aperture. To bypass this problem, we need to change a configuration, as follows.
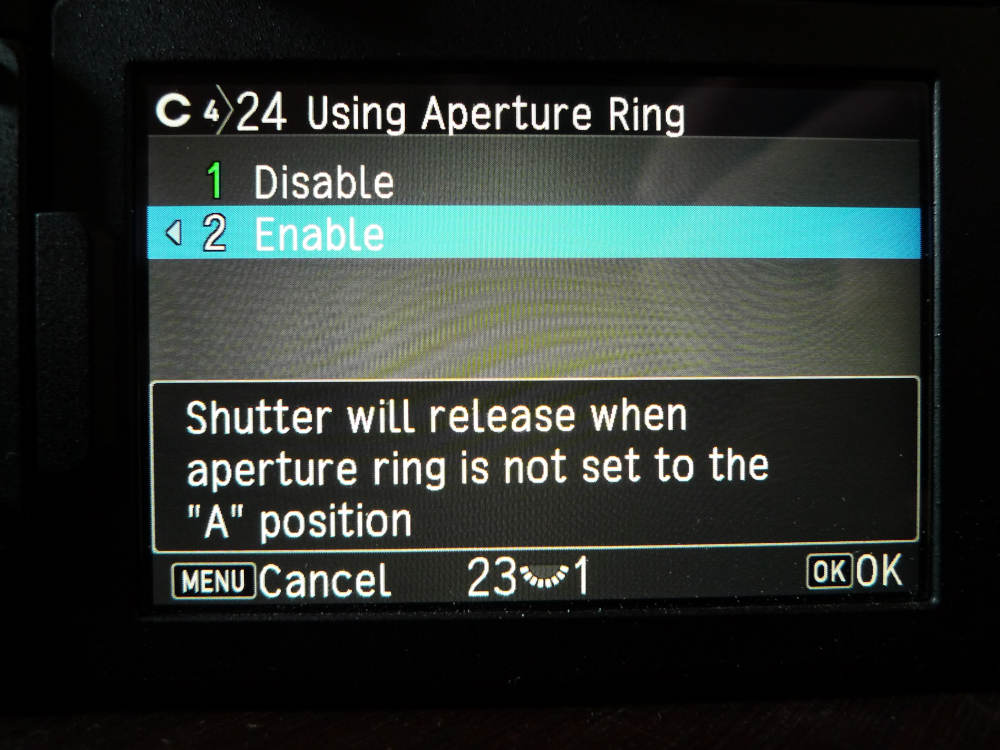
2. Change ‘User aperture ring’ option
For this, press the menu button and click the left button (the one with the flash icon) once. You are going to the last page of the camera setup.

Then, select ‘Using Aperture Ring’ with the directional keys and press the ‘Ok’ button.
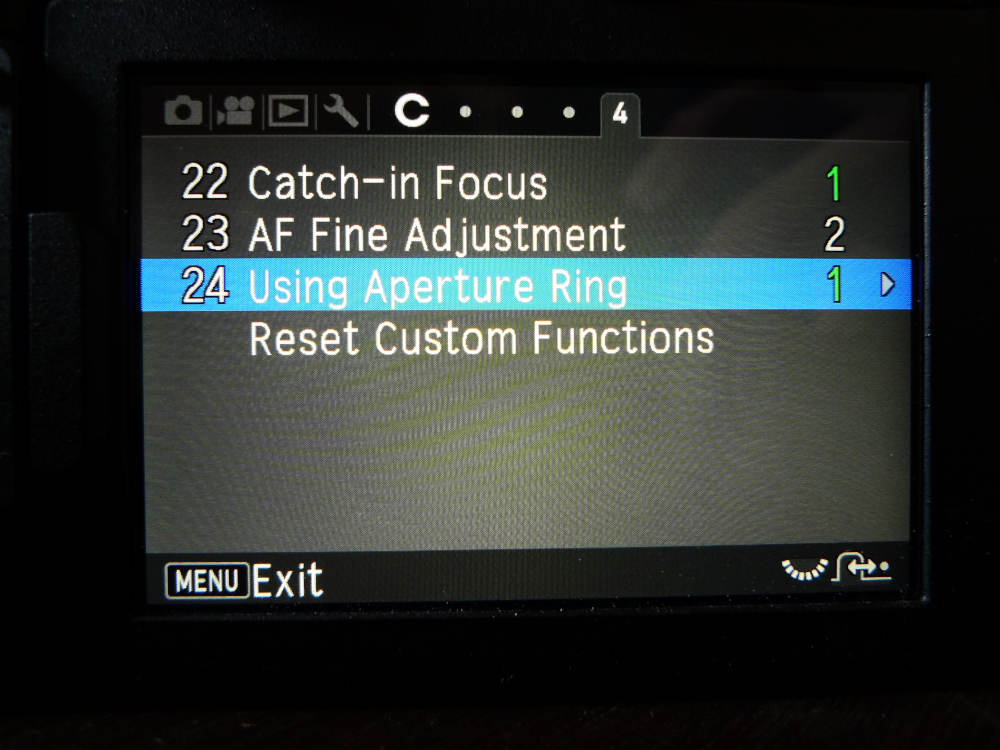
Now, select the option ‘2 Enable’ and press ‘Ok’. Press Menu to leave the setup and we are done.
Photometry with the K-mount vintage lenses on a modern Pentax DSLR
Here, stuff gets a bit tricky because the camera can’t do the photometry by itself, since it lacks the f-number. However, there are two possible workarounds for this. The first is to simply use the manual mode and take several pictures changing the shutter speed until you can find a good exposure parameter. This is a trial and error method that can work most of the time. This is the method I often use because is simple and after you get the eye for exposure, it becomes natural.
However, there is a more secure way of doing this, but we are going to need to change some parameters. In this case, I recommend you configure one of the user settings positions (such as U1, U2, or U3) to use only with vintage lenses, so every time you attach it, you can easily retrieve the best configuration.
Setting the Preview button
Also, we are going to need the depth-of-field preview setting to properly use vintage lenses with a modern Pentax DSLR. In the Pentax K70, it is activated through the green button next to the shutter-release. However, it is just temporary, and don’t let you make the photometry. To change this, I configure the ‘RAW/Fx1’ button to act as a depth-of-field preview.
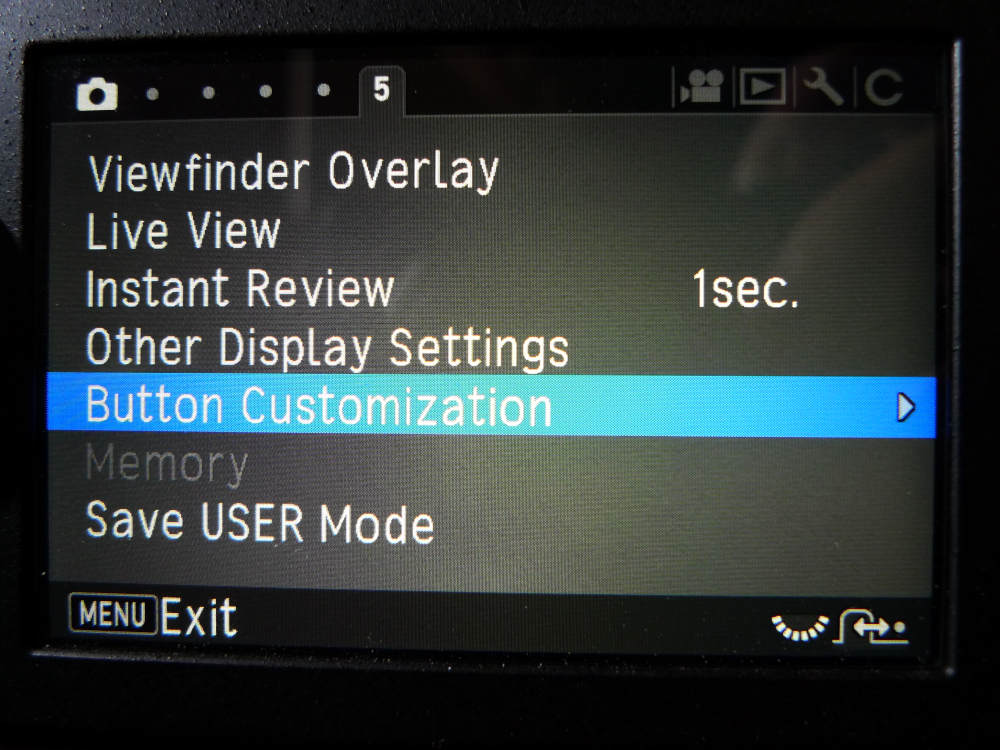
1. Press the ‘menu’ button and go to tab number 5.
2. Go to the ‘Button Customization’ option
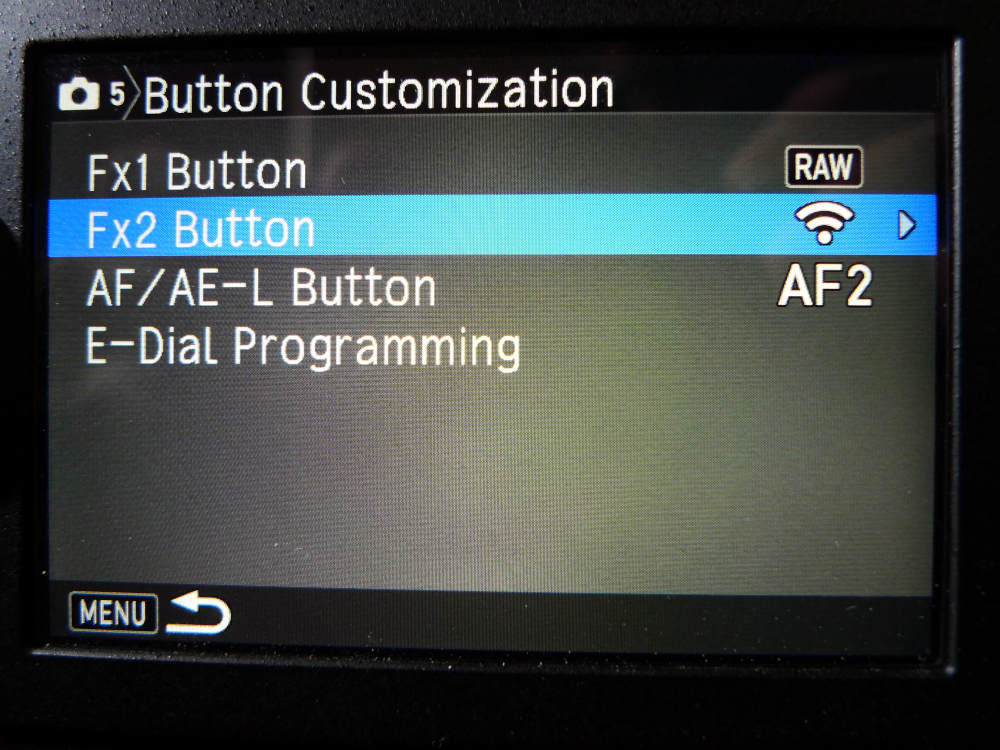
3. Select the ‘Fx1 Button’ and press ‘Ok’
PS.: After I finished taking all the photos, I realized that it is a better idea to set the Fx1 button on the side of the camera body for this function. I will explain this in the next session. However, the procedure is the same, just select Fx1 button instead of Fx2.
4. Select the current option and press ‘Ok’. It is usually set as ‘RAW’.
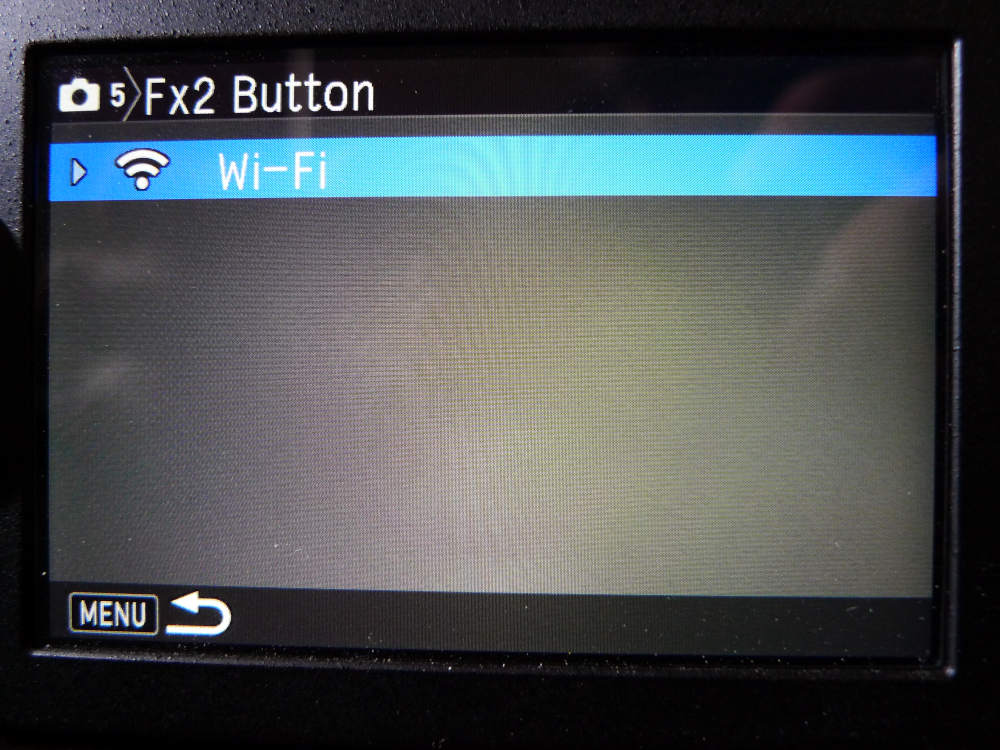
5. Select the ‘Preview’ option and press ‘Ok’.
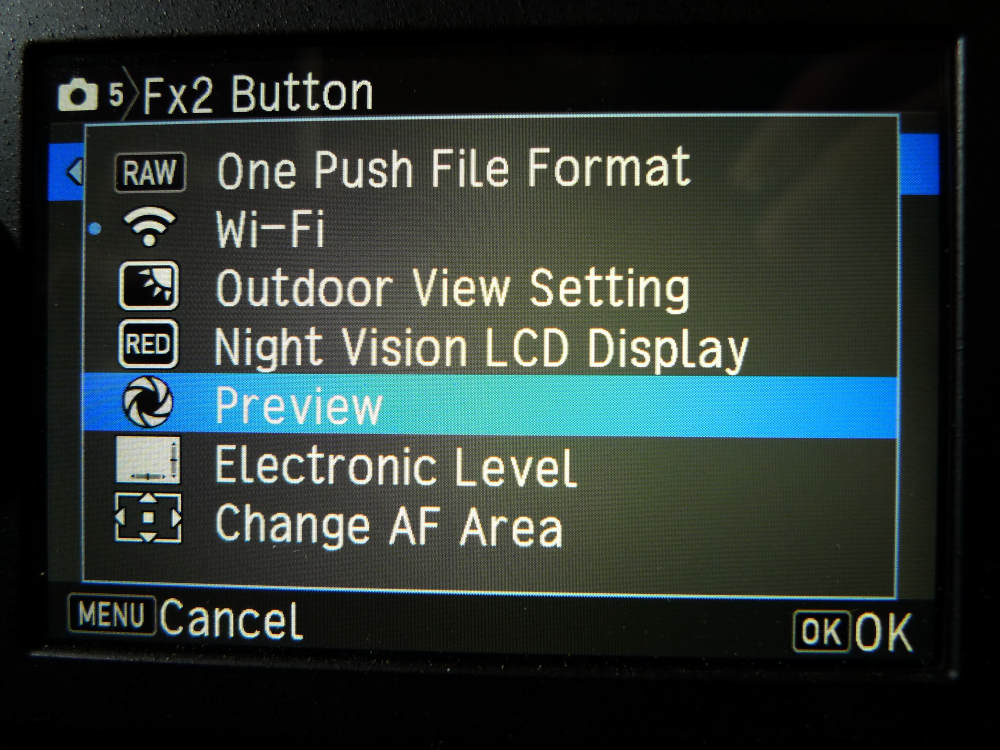
6. Then press ‘Menu’ to leave the menu.
Reading the photometry
Now, to have a preview of the photometry, all you need to do is is keep the Fx1 button pressed while looking inside the viewfinder. At the bottom left of the viewfinder screen, there is be an exposure meter, as you can barely see in the image below. The reason for using the Fx1 button instead of Fx2 is that you can use one hand to hold the Fx1 while the other is free to rotate the shutter speed wheel. Using the Fx2 button while adjusting the shutter requires some finger athletics.

All you need to do is change now is the shutter speed or ISO until it reads ’00’. The photometry is done and you are ready to shoot! You can also use the exposure compensation setting.
Focusing
An interesting trick is that you don’t need to change the side lever of the Pentax DSLR to the MF position to use those manual focus vintage lenses. So, while the shutter release is pressed to the first stage, you can adjust the focus until the camera beeps, indicating it found the best focus in the selected spot. Since those cameras usually don’t have a split-prism to help to focus, it is a good idea to use this resource.
You can also use any of the focusing spots available in the camera and also use the manual focus resources of the live view.
Lenses with autofocus and auto-aperture
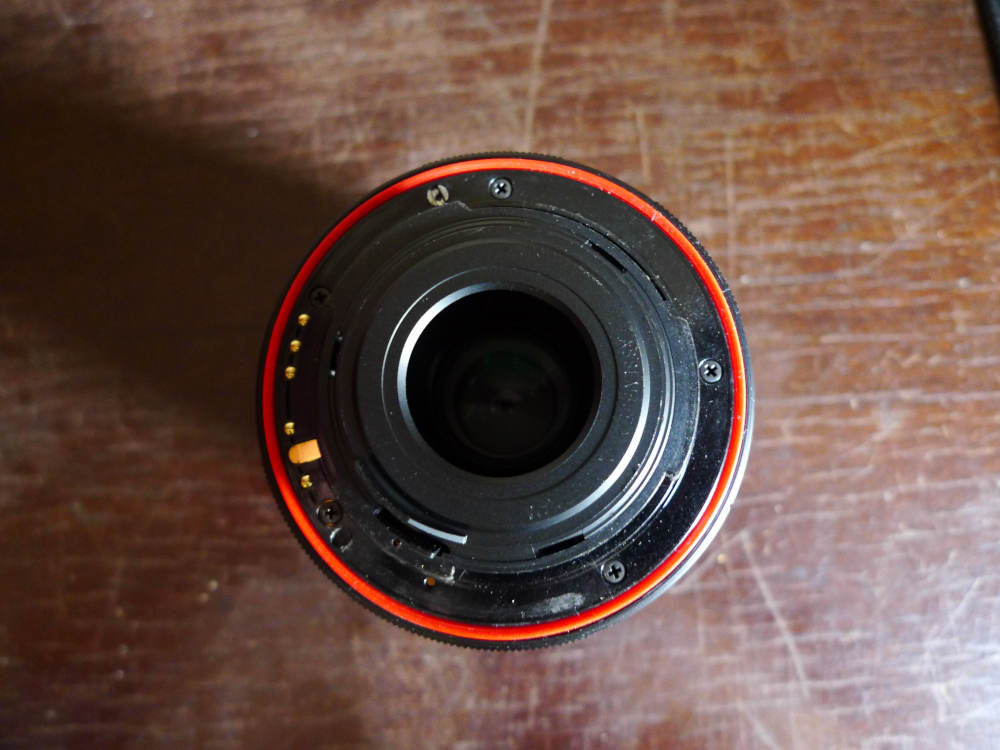
There are some lenses that are vintage but are also fully automatic. Those, such as the F-series, doens’t require any further setup to work properly. In those cases, just look for electrical contacts on the mounting surface. If they are there, compatibility isn’t a problema at all.
Also, those lenses have an automatic setting for the aperture. When configured in this way, you can use the aperture wheel of the camera body to set it as usual. Autofocus will also work just fine.
Conclusion
So, I hope you now can set up and use vintage Pentax K-mount manual lenses on your modern DSLR. There are lots of those lenses available and they are just great. If you have any questions, please leave in the comments below!
Strange that you don’t mention the “catch-in focus” feature designed for manual lenses that is c23 and can be seen above (I also see you do not have it on).
Thank you for your advice! I will look for it!
Maybe using camera in aperture priority mode is simpler method since camera will automatically select shutter speed in relation to amount of light already set by manual aperture.
You can use the green button for metering in manual mode
That’s a good tip! Thank you!
You forgot to say, although it is implied, that with a manual K-lens you are restricted to shot at full aperture. For example I own a good 50 mm f/1.7, but on my K5-II I can use it at f/1.7 only.
I think this is the main drawback, because manual focus is not an issue, unless you are doing sport photos.
Thank you for the information, I really didn’t noticed it.