Originally posted on my disabled blog VintageCameras.Info
The Yashica EZ Mate Data is a compact point and shoot 35mm film camera from the end of the 90s. It is a focus-free camera and doesn’t have any kind of adjustments such as speed and aperture or even the ISO. However, this kind of camera is very popular among people who enjoy Lomography. If it is your case, this Yashica EZ Mate Data instruction manual is for you!
There is also a simpler version of this camera, which is the Yashica EZ Mate (without the ‘Data’) that works exactly the same, except it doesn’t have the data marking system, so this manual applies to them, too.
Basic Operation
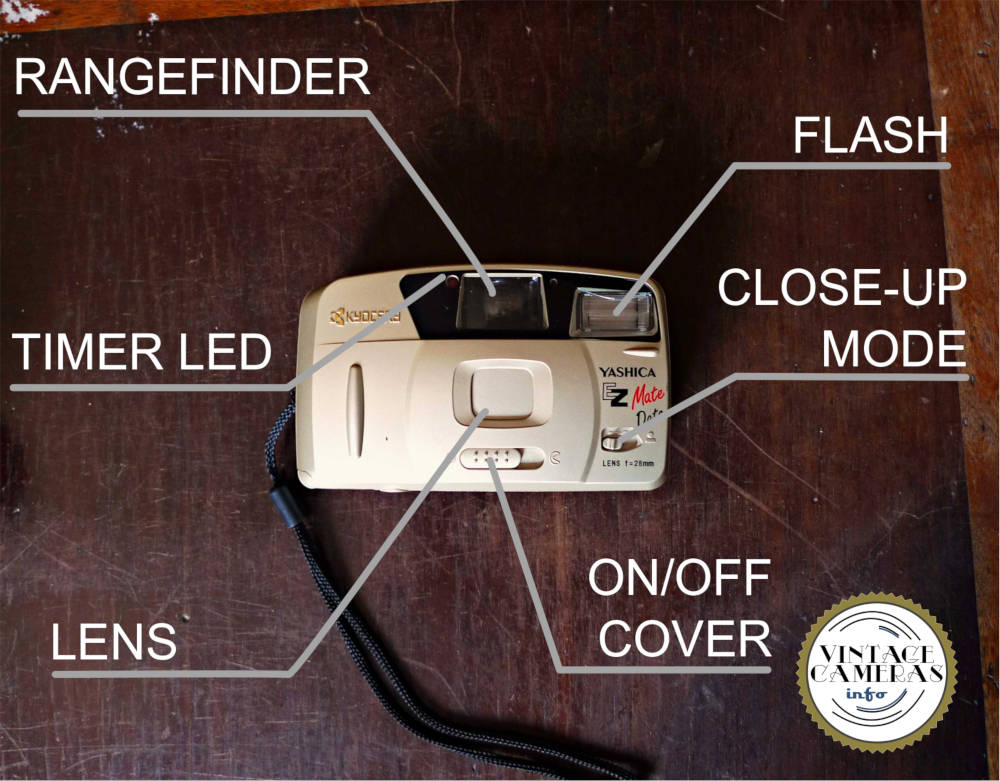
This camera is no more no less than a literal point and shoot. There are no parameters aside for the close-up and flash modes. It has a simple and very wide rangefinder, which I think is great.
How to insert batteries in the Yashica EZ Mate Data
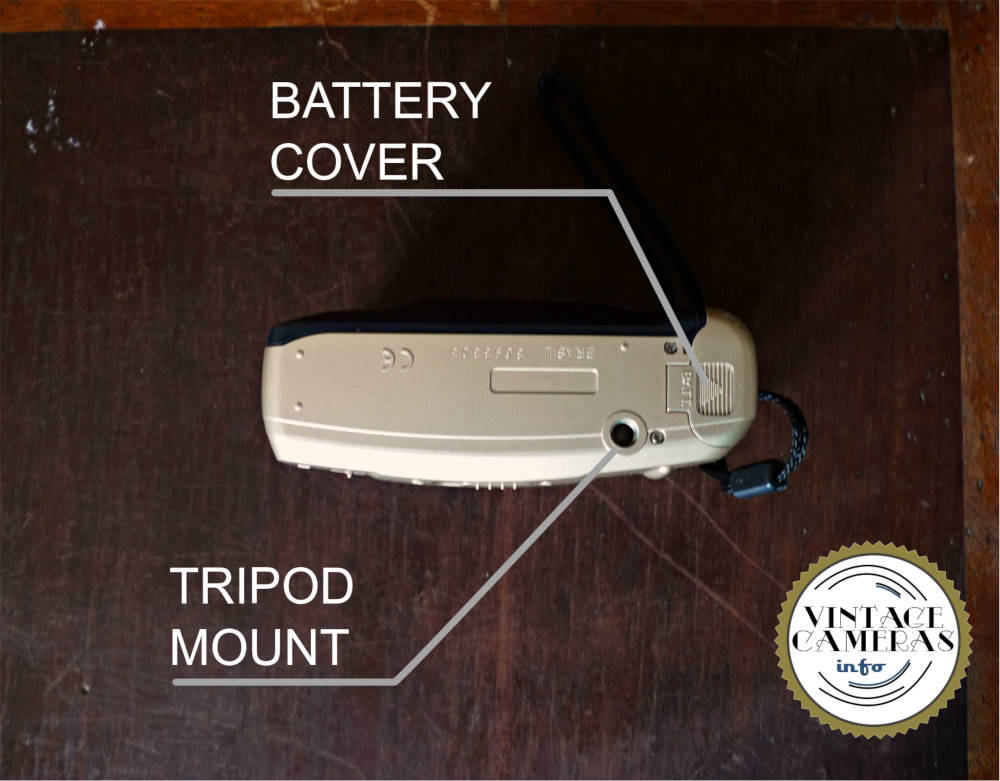
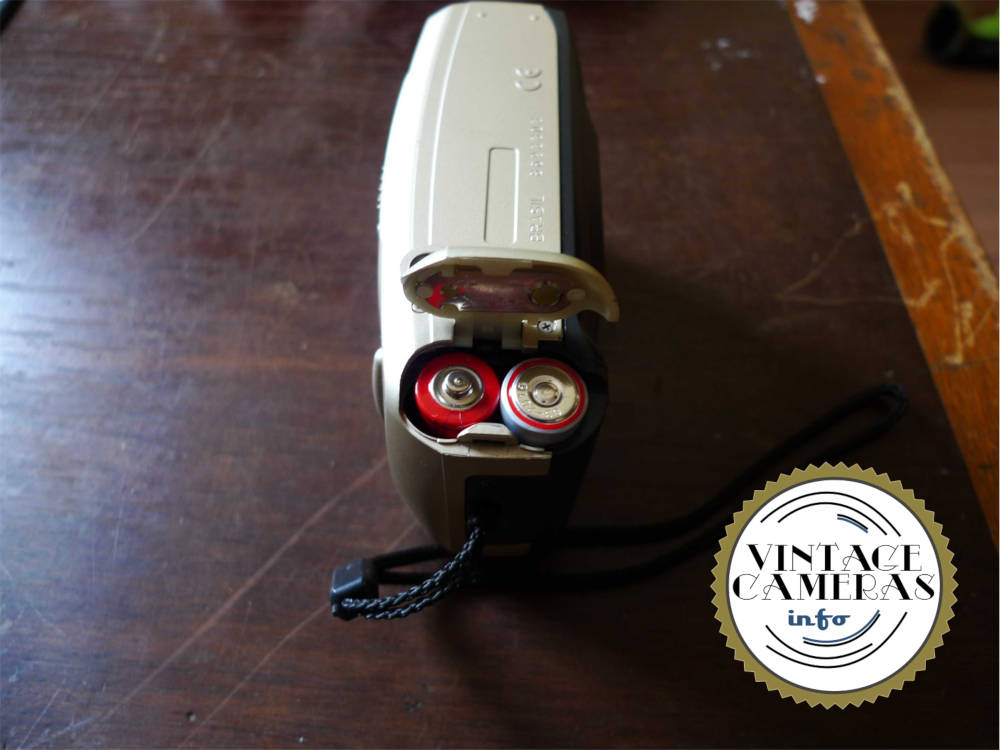
As always, let’s begin the Yashica EZ Mate Data instruction manual by putting it to work. This camera uses two AA batteries. To install them, folow these steps:
- Open the battery cover sliding it outward and then lifting it up.
- Insert batteries oriented in the direction shown in the image bellow.
- Close the battery cover.
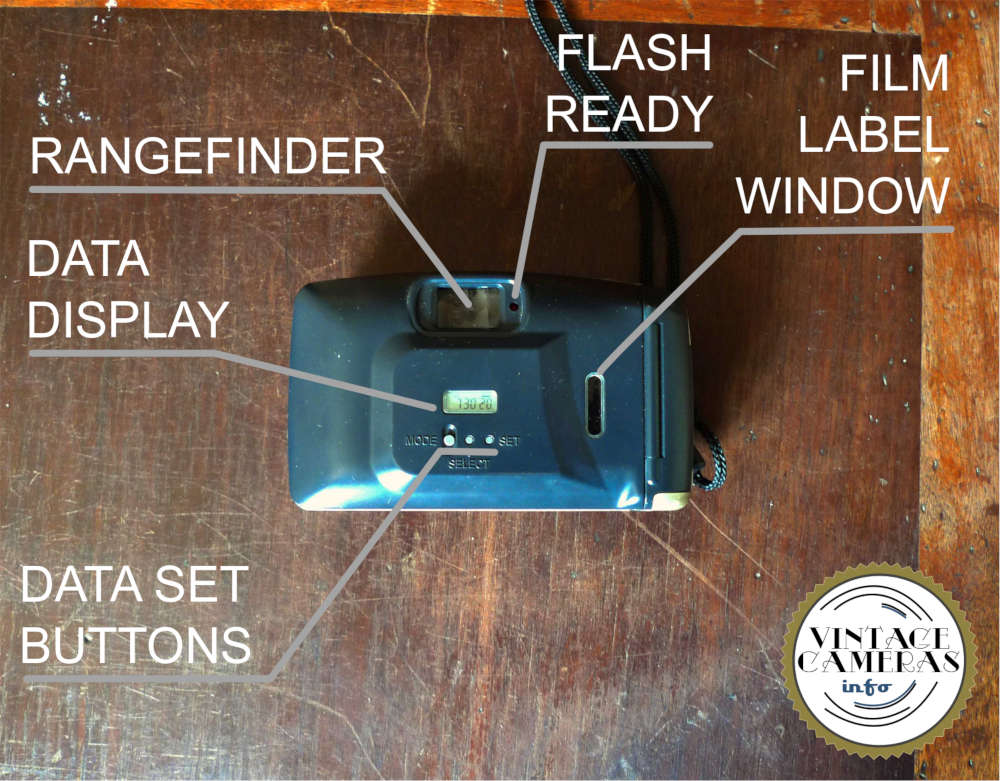
If your camera is working fine, the back LCD screen should be displaying ‘1 1 98’.
How to set the date in the Yashica EZ Mate date
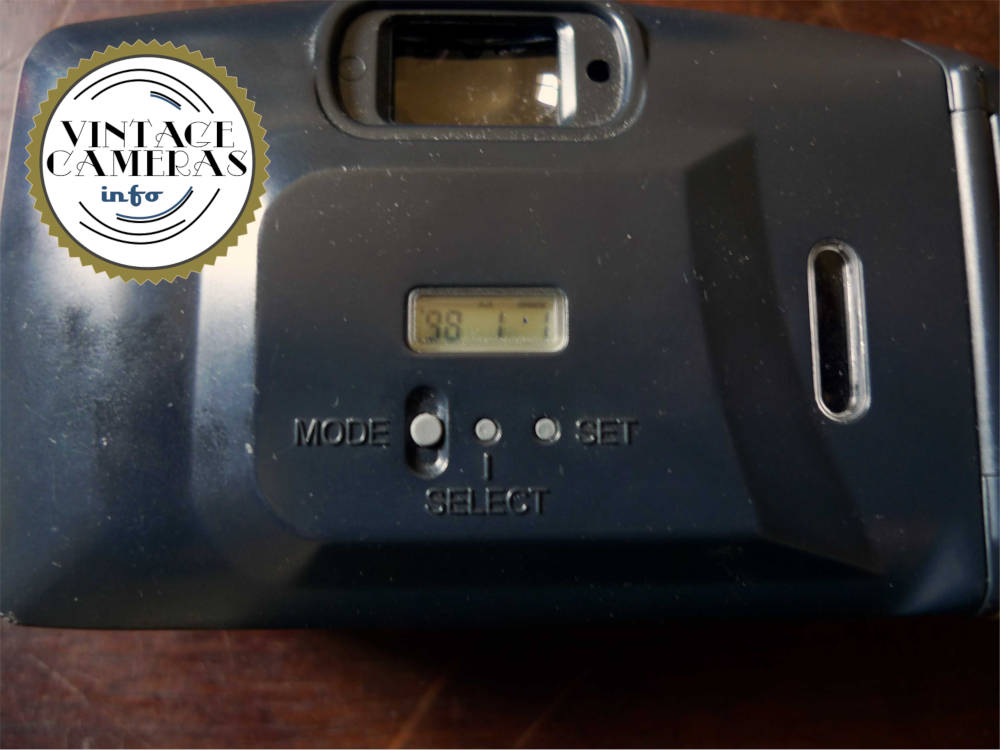
Now that your camera is working, let’s begin by setting the date and time. To set the date in the Yashica EZ Mate Data, follow these steps
- Press the ‘mode’ button at the back of the camera until the data is displayed. If it is the first time the camera is used after the battery is installed, it must be displaying ‘1 1 98’.
- Using a toothpick or any object with a blunt point, press the ‘SELECT’ button. The year digits will blink.
- Press the ‘SET’ button to change the year.
- Press ‘SELECT’. The month digits will blink.
- Use the ‘SET’ button to change the month number.
- Then, press ‘SELECT’. The day digit will blink.
- Use the ‘SET’ button to change the day.
- Press ‘SELECT’ again to finalize.
Now, you can press the ‘MODE’ button to change the format of the date. the first option is MM/DD/YY, then DD/MM/YY, YY/MM/DD, and, finally, day and time. To set the time, follow these steps:
- Press the ‘Mode’ button until the display shows the day and the hour.
- Press ‘SELECT’, the hour digit will blink.
- Use ‘SET’ to adjust the hour.
- Then, press ‘SELECT’, the minutes digit will blink.
- Now, use ‘SET’ to adjust the minutes and press ‘SELECT’ to finalize.
If you want to disable the date markup on your photos, press the ‘MODE’ button until the LCD displays ‘– — –‘.
How to take photos with the Yashica EZ Mate Data
To take photos with the Yashica EZ Mate Data, follow these steps:
- Slide the ON/OFF button just below the lens to the left. Then the lens are exposed and the flash charged.
- The flash LED on the right side of the viewfinder will light indicating it is charged and ready to shoot. If you are not going to use the flash, ignore it.
- Use the rangefinder to compose your photo and press the shutter release.
- The camera advances the film automatically.
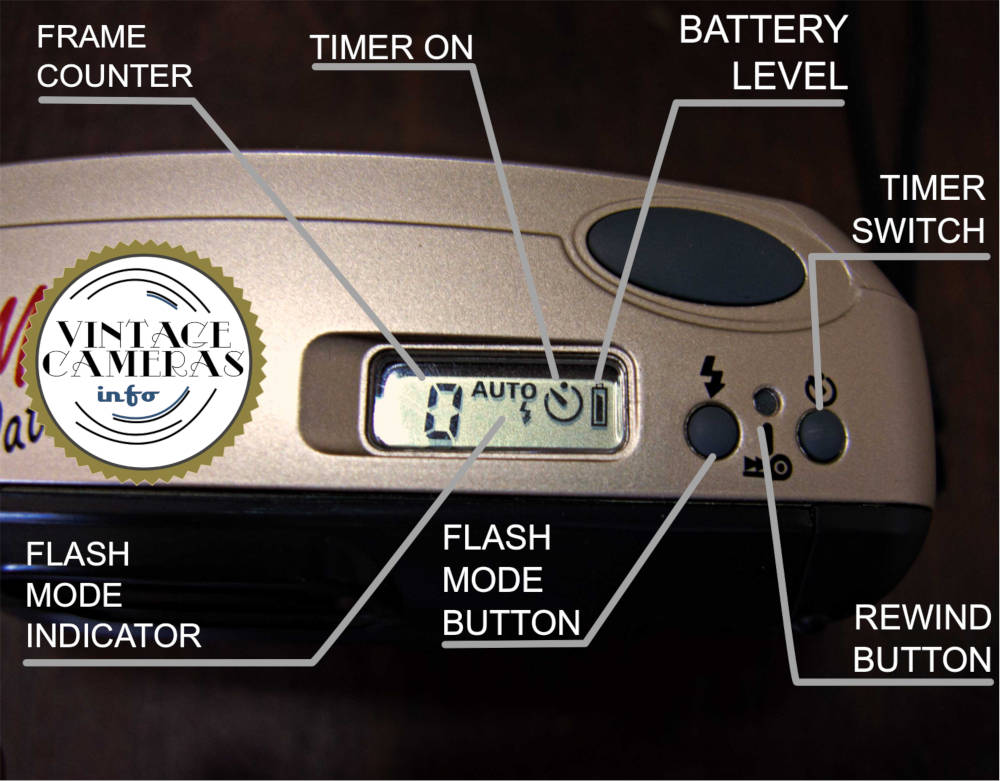
Flash Modes
The flash modes are chosen using the flash button on the right corner at the top of the camera. The available modes are ‘auto’, ‘always on’ and ‘off’. The actual flash mode is displayed on the main LCD right next to the buttons. If in doubt, use ‘auto’.
How to use the timer
To use the timer, press the button on the right corner at the top of the camera for 2 seconds. The timer icon will appear on the main LCD display. To use it, press the shutter release button. There is a LED at the front of the camera, right next to the rangefinder, that will blink to indicate the camera will shot. It will blink faster when it is about to fire. To disable, press the timer button for 2 seconds, the icon in the display will disappear.
Close-up mode
Since it is a focus-free camera, by default it is optimized to focus at infinity. This means that it is not so good for close-ups. However, Yashica, as a smart company, put a Close-up mode in this camera model. For using it, slide the close-up latch at the front of the camera while shooting. This should be fine for a distance to subject of about 1 to 1.5 meters or 3 to 5 feet.
How to load film in the Yashica EZ Mate Data
To load film in the Yashica EZ Mate Data, follow these steps:
- Open the back cover using the latch on the camera lateral.
- Insert the film into the chamber on the right side.
- Pass the film over the rails and land it over the spool. There isn’t a hole to strap the film in the spool, so just put its tip there.
- Engage the film on the sprocket.
- Now, close the back cover, the camera will stretch the film automatically.
- The camera selects the ISO automatically.
- The frame counter is located on the main LCD.
- Done!
How to rewind and unload the film in the Yashica EZ Mate Date
To rewind and unload film in the Yashica EZ Mate data, follow these steps:
- If the camera doesn’t rewind the film automatically when it is finished, push the rewind button at the right corner of the top of the camera with a toothpick.
- Now, wait until the camera finishes rewinding.
- Open the back cover and remove the film.
My counter stills 0 when I put the film. What should I do? Is it okay to press the rewind button? Thank you!
When you put the film the counter must always go to zero. Then, shoot some time until it gets to 1 or 2.
If it still is at zero after shooting sometimes, maybe the film is not correctly engaged in the sprockets. Remove and put the filme back on. If this doesn`t solve the problem, the camera mey be deffective.
Is it possible to change the camera iso? I bought a film that recommends iso 50, but I’m afraid the photos go dark using this camera.
No. ISO is a chemical property of the film emulsion. If your camera can’t reach ISO 50, you can set it to ISO 100 and compensate exposure one stop up. But, generally speaking, if you set it to 100 and the film is actually 50, the photos will be darker, but not as much to trash your photos. You can compensate it later on development or digital processing.